|
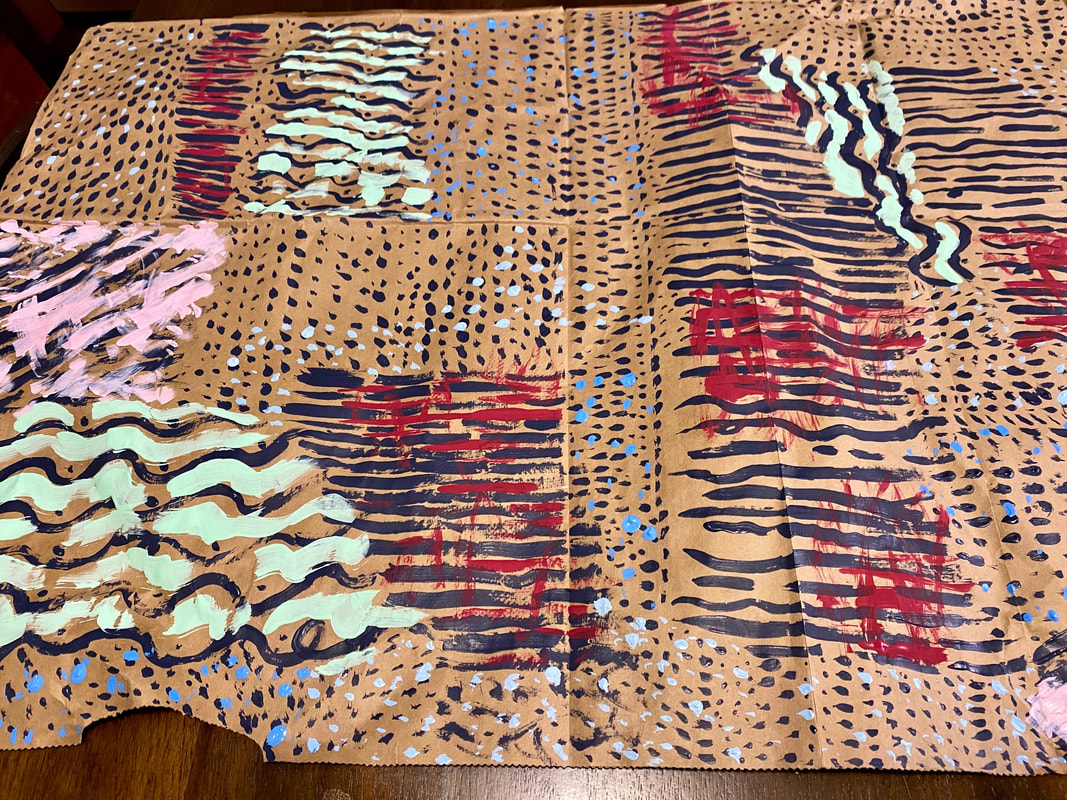
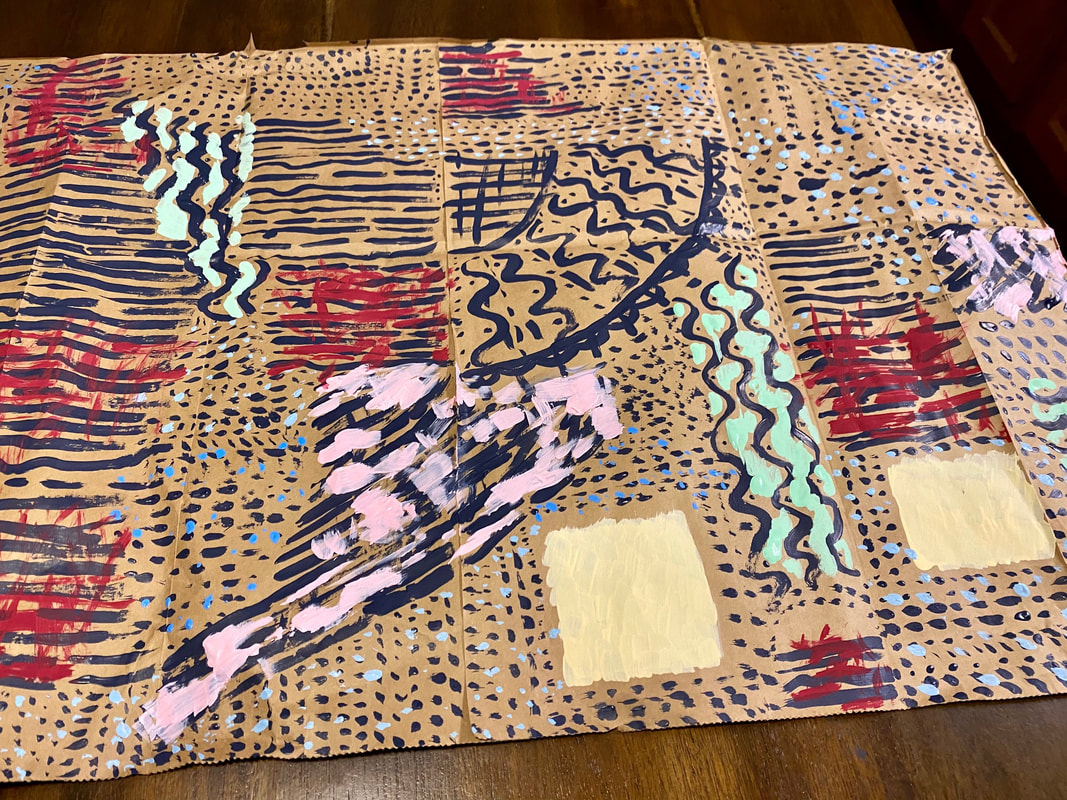
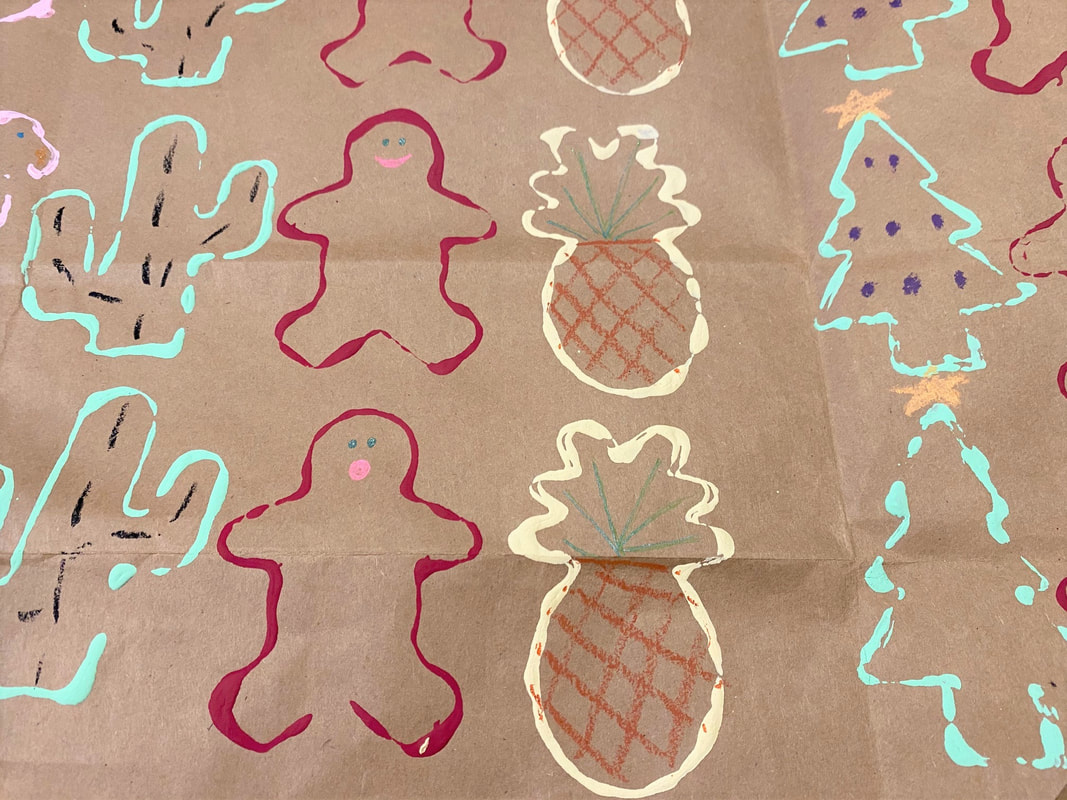
You’ve made the effort to find the perfect present—now don’t forget about its presentation! This year make a holiday statement that is also sustainable with hand painted wrapping paper. With upcycle treatment, a humble grocery bag becomes merry and bright gift wrap that evokes wonder in all! All you need is acrylic paint in your favorite colors and a few household items to create these designs. 1. Fork it over! Use the tines of a fork to print the paper with chevrons in contrasting classic Christmas colors. Experiment with different color schemes and patterns. 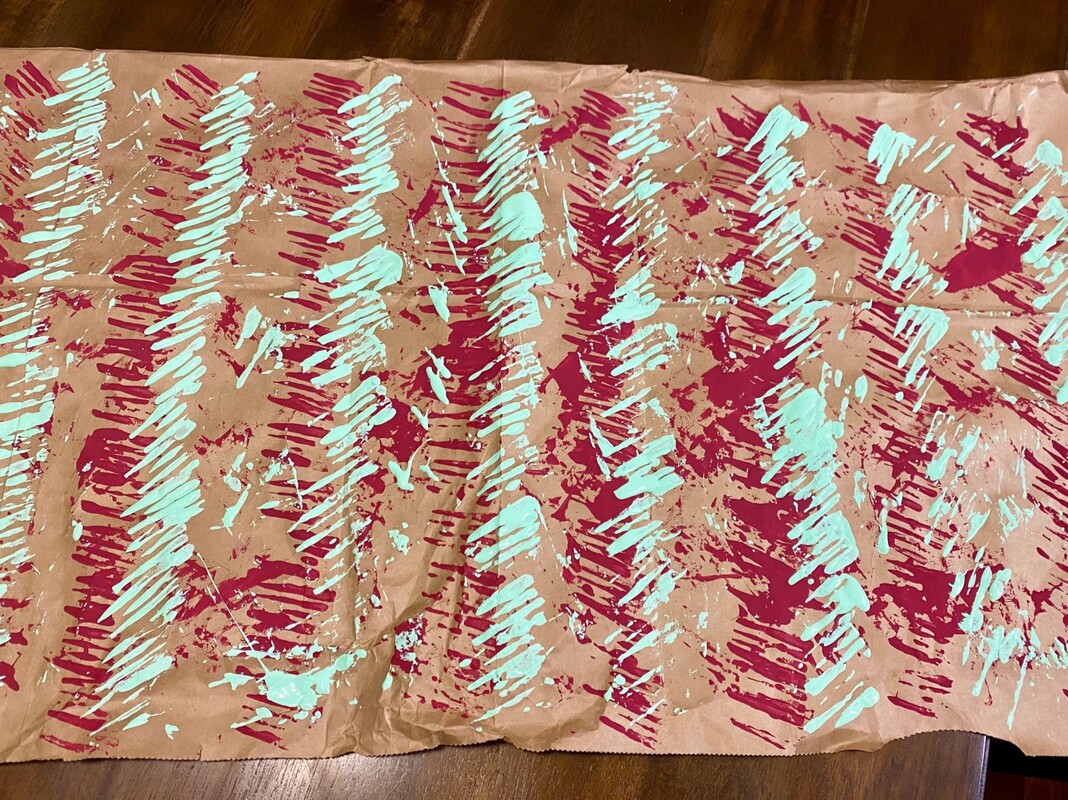 2. Connect the dots. Paint the paper with dots, lines, and squiggles in navy blue or black. Add tiny pops of color with icy pastels. 3. Be a smart cookie! Dip your most beloved holiday cookie cutters in paint to print the paper. Once the paint has dried, draw in the fine details. Try creating your own designs or printing paper with other found objects such as seashells or leaves. It’s a wrap! If you have leftover paper, upcycle it into ornaments or gift tags.
0 Comments
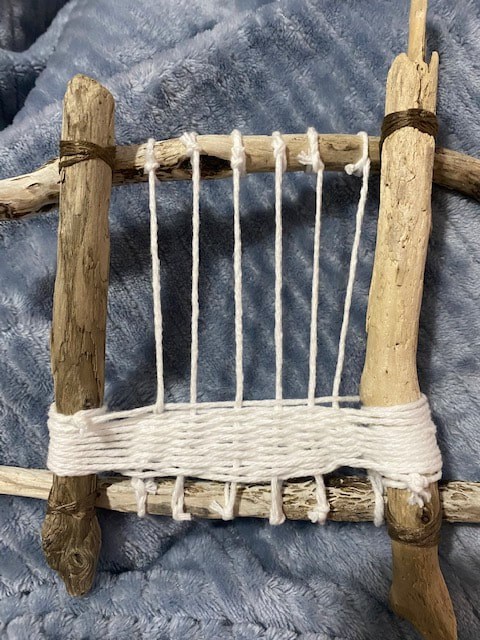
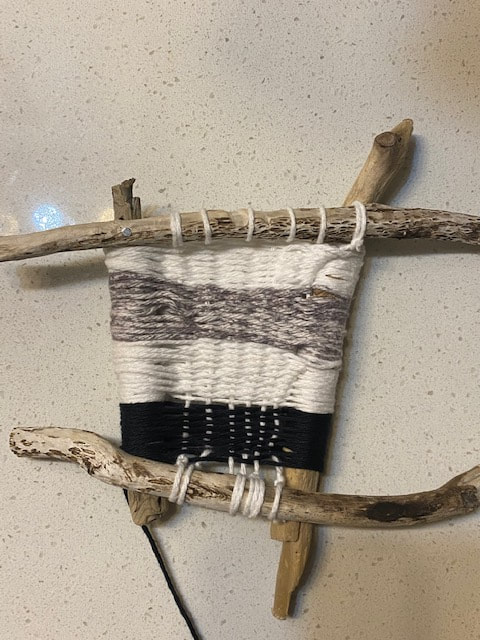
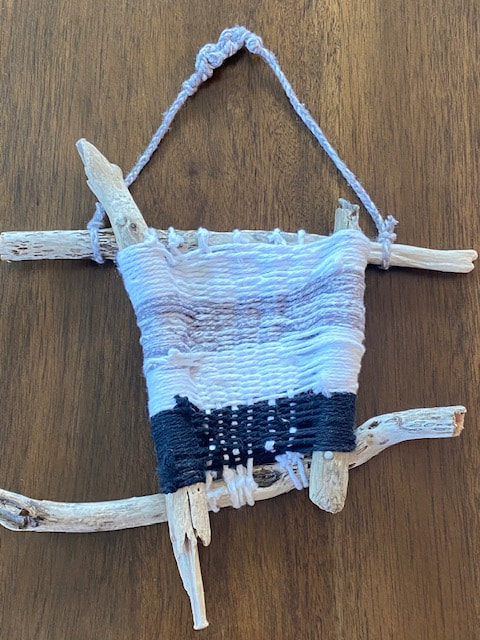
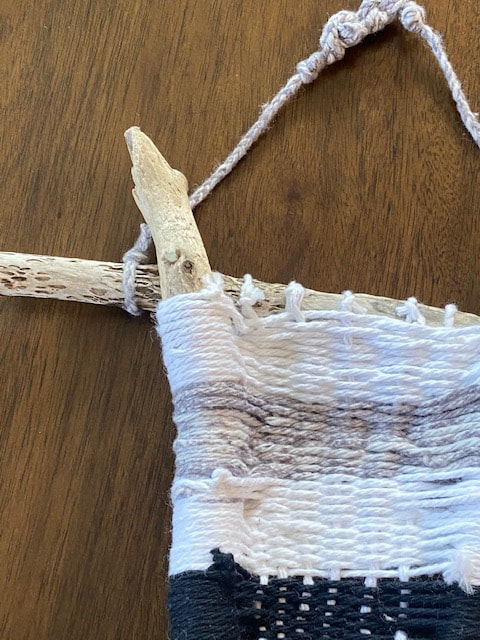
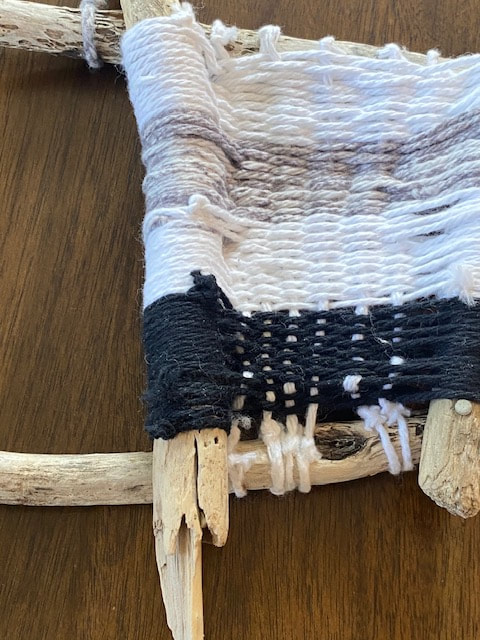
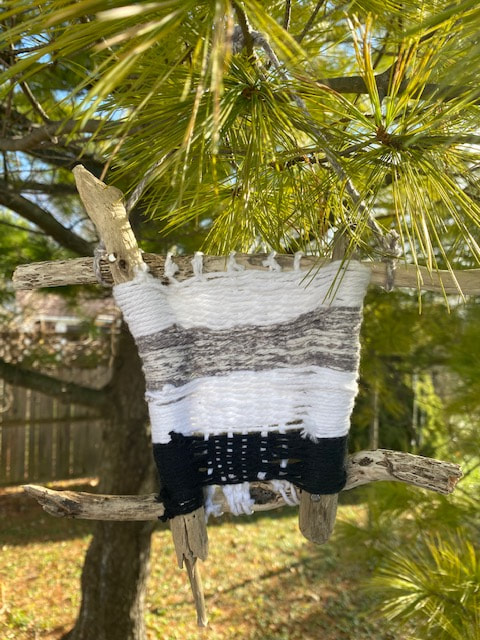
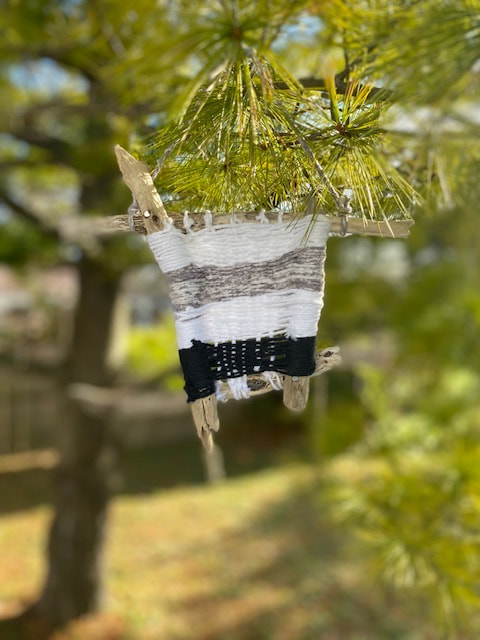
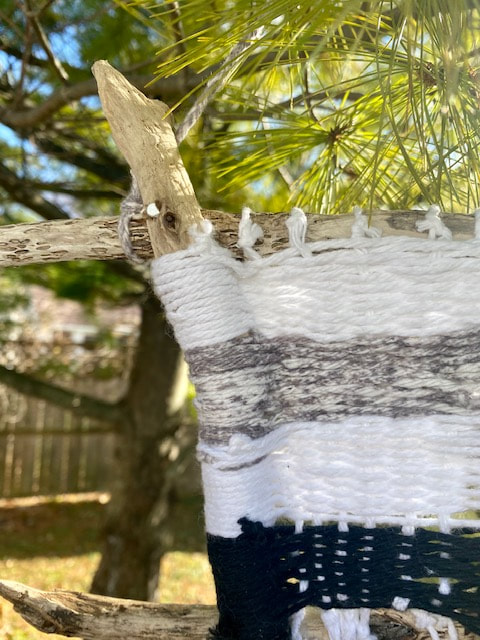
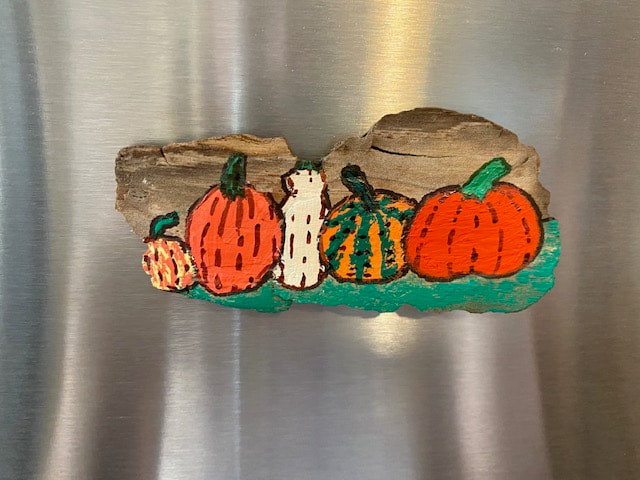
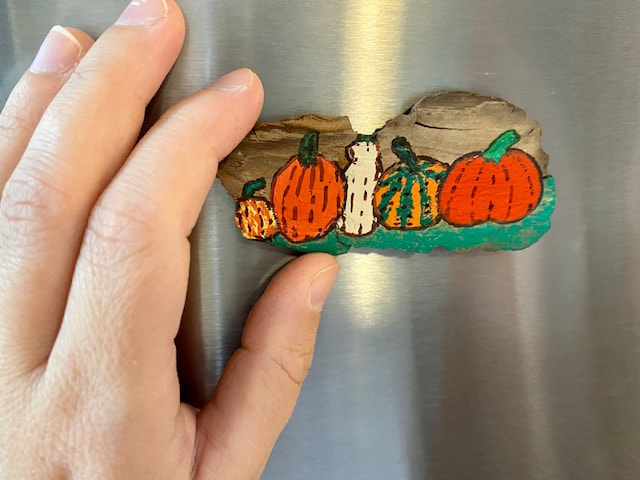
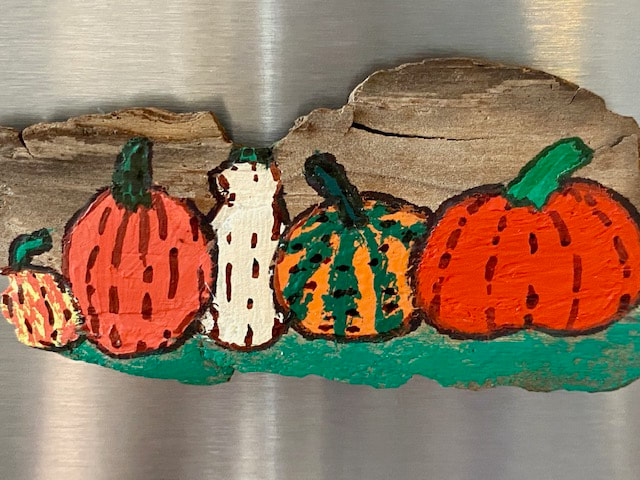
Cold weather calls for all things cozy. Create a boho wall hanging with a driftwood or twig frame and cotton yarn to add seasonal comfort and texture to your space. Here’s how to make it: 1. Create a frame for your project. Using twigs or driftwood you’ve collected, tie or nail them together to create a frame. Yarn, embroidery floss, floral wire, or long, thin strips of leather make good ties. If you choose to secure your frame with nails, proceed with caution because driftwood has already been distressed by the elements and may crack. 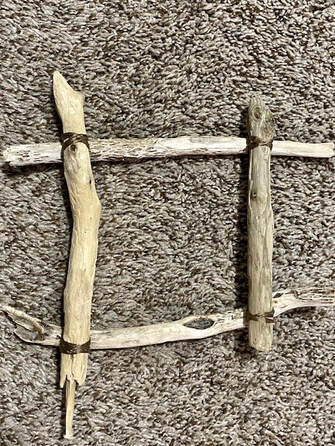 2. Warp the frame. Tie threads that run vertically to the top and bottom of the frame. The warps will support your weaving. 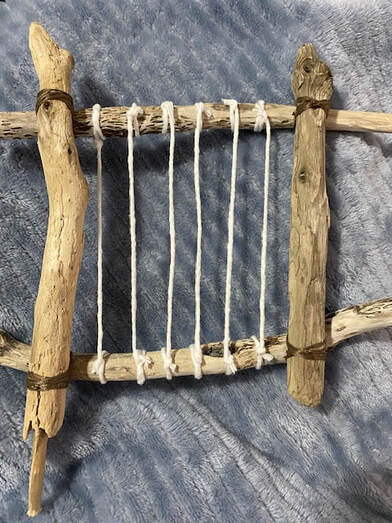 3. Weave a design. One of the simplest weaving stitches is tabby weaving. Use this technique to fill the frame with yarn. 4. Make a hanging loop. Braid a length of yarn and tie it at both ends. Embellish it with knots at intervals. Attach the hanging loop to the frame with slip knots. 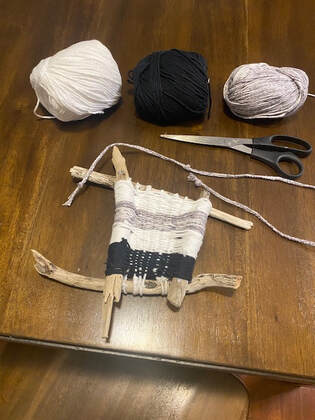 Your project is ready to enjoy! A dappled pebble, an iridescent feather, a solitary acorn—I’m always collecting tiny treasure that I come across in nature. When I found this piece of driftwood on the beach, I knew it would be perfect for a future project. Weathered, worn wood always makes me think of fall. If you can’t find a suitable piece of driftwood, a sanded scrap of wood would also work well for this project. To prep the driftwood, rinse off any remaining sand from its surface and let it dry. Lightly sand the driftwood so paint adheres to it. Outline where gourds and pumpkins will be in pencil. Paint them with gouache and acrylic paint. Draw in fine details with a Sharpie permanent marker. Finally, use super glue to secure a magnet to the driftwood. Another option is to create an ornament instead of a magnet. Drill a hole into the driftwood and run a ribbon through it to create an ornament.
Here’s to a cozy, creative fall! Whether you’re avoiding COVID-19, putting on real pants, or venturing out in a polar vortex, there are many great reasons to stay home when cold weather arrives. Staying in can be almost as interesting as a night out on the town! Here are a few things that you can do in the months ahead to enjoy your time at home: 1.Read all about it. Think of something that you would like to learn more about and create a custom reading list based on that theme. This year, I’ve been reading the work of American female writers. So far, I’ve read books by Emily Dickinson, Sylvia Plath, and Louise Erdrich. I’ve also been learning about Milwaukee’s history. John Gurda’s books are a must if you’re interested in delving into the Cream City’s past. 2.Refine your craft. Take the handmade route or go futuristic. Learn a skill that is completely new to you or revisit an activity that you haven’t done in many years and take it to the next level. My current must-learns are:
3.Make the digital journey.
If you can’t visit a museum, gallery, or destination in person, check for a digital version. I’ll be visiting:
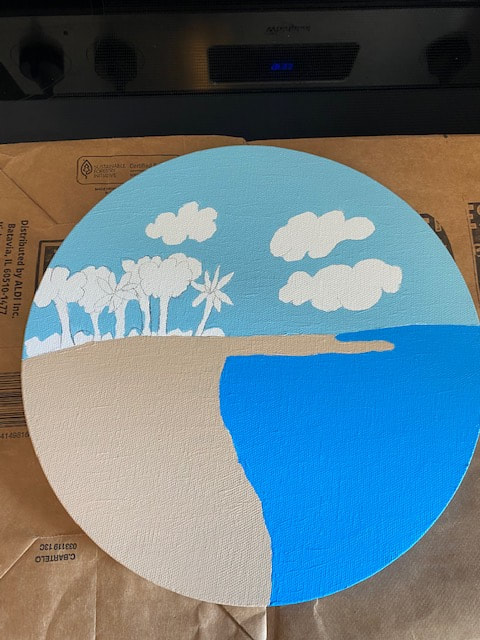
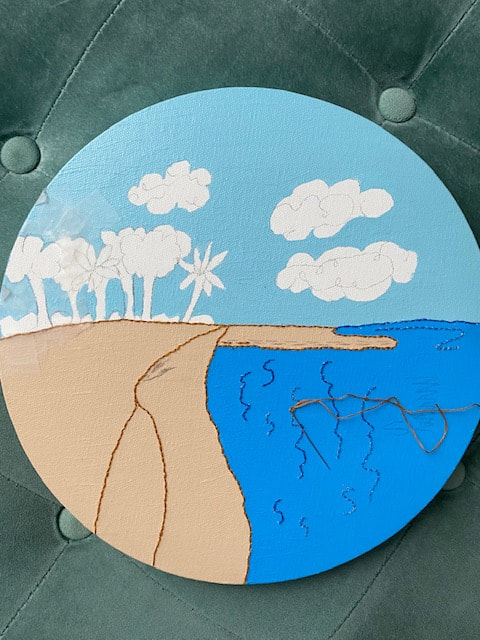
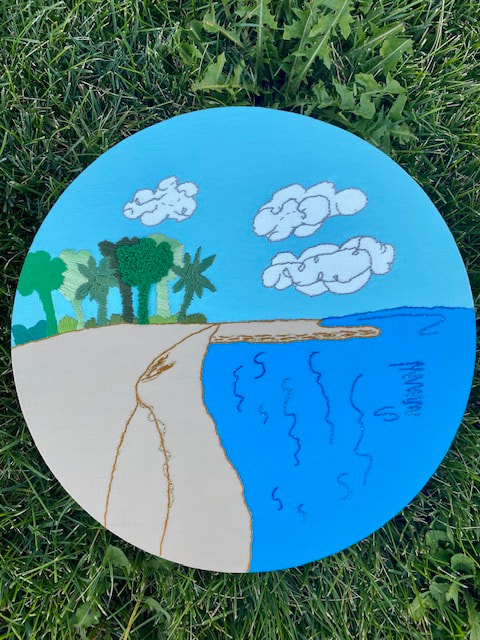
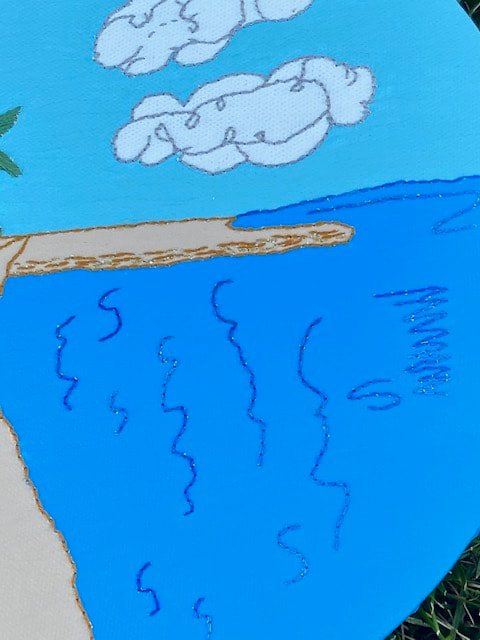
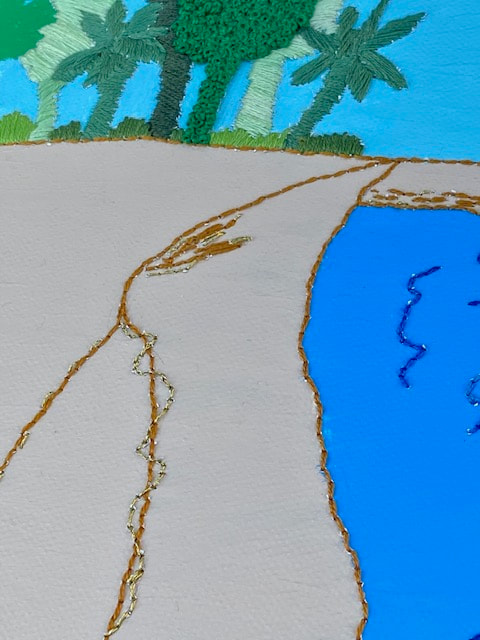
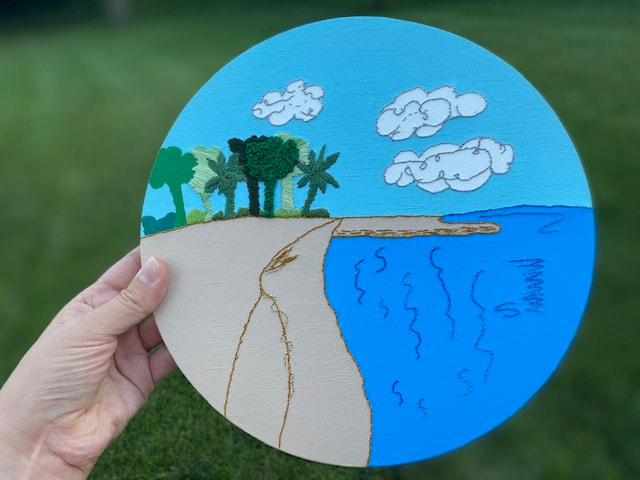
The inspiration: Fort Myers Beach, Florida  The plan: 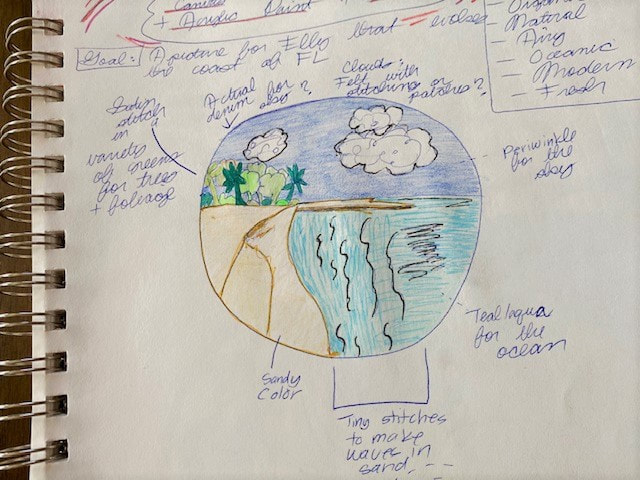 The process: I sketched, painted, and stitched this piece. The finished project: Serenity
If you’re interested in a custom textile design, please reach out to me at upcyclemom@gmail.com. I can make your vision a reality!
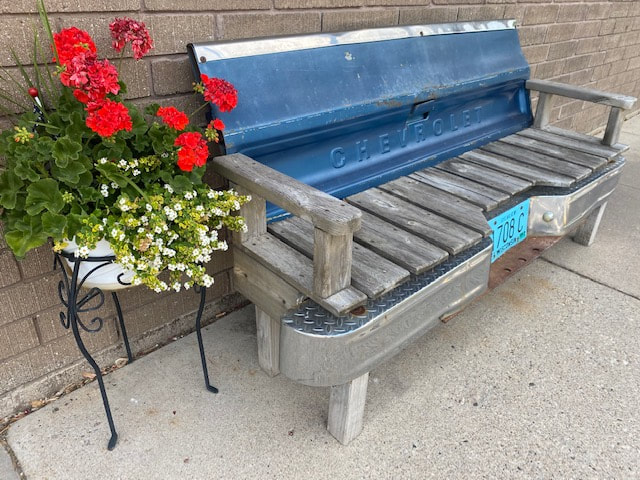
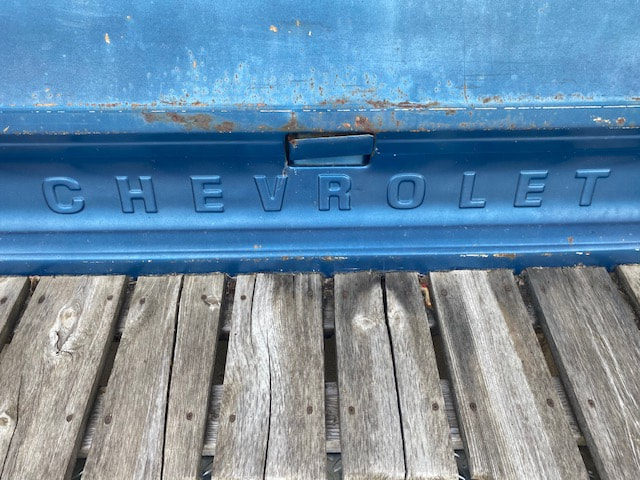
With no snow cover on the ground and plenty of long holiday weekends, summer is the time to take a trip in Wisconsin. I hit the road for Winneconne with plenty of face masks, Lysol, and hand sanitizer packed. The historic part of the fishing village was decorated adorably for the Fourth of July! I spotted an impressive upcycled item outside a diner there. Someone with talent and a great imagination salvaged parts from a vintage truck to create a unique bench. People are making the effort to live creatively and sustainably everywhere I go. On, Wisconsin!
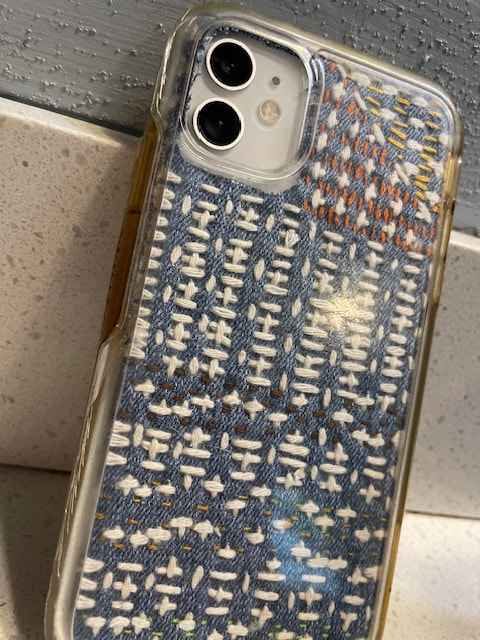
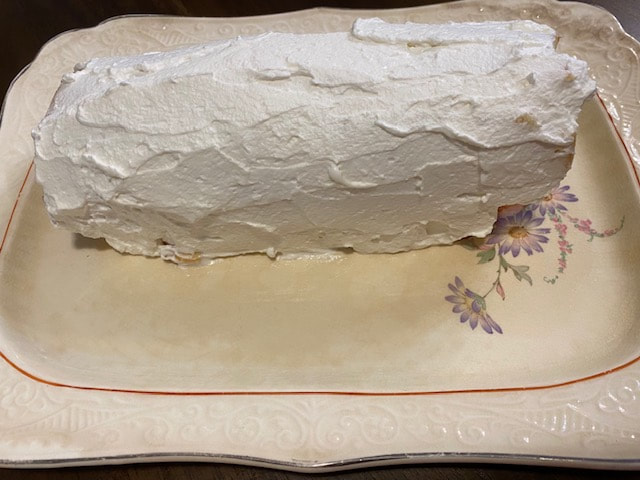
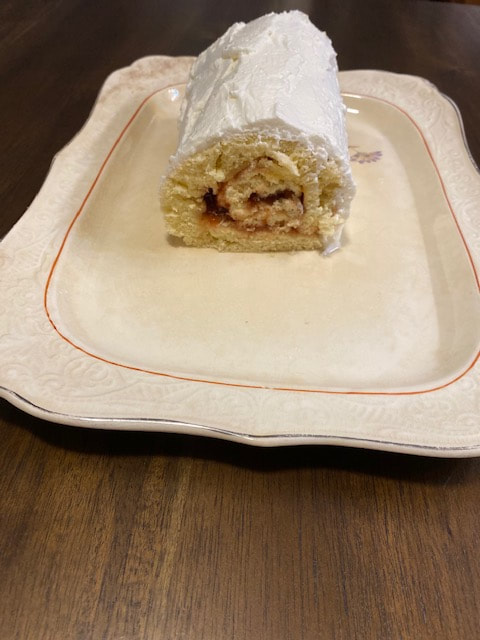
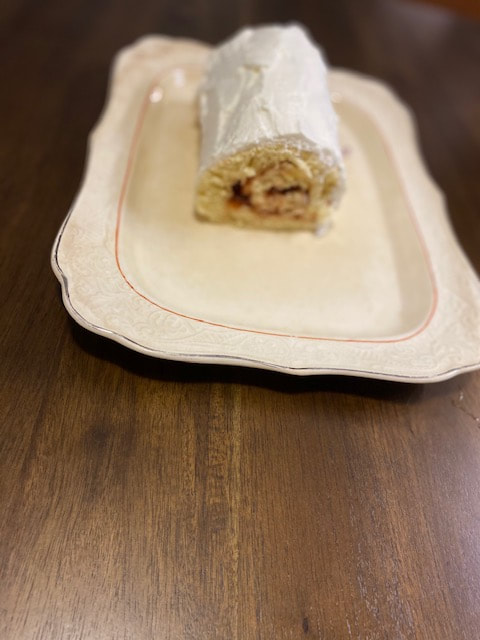
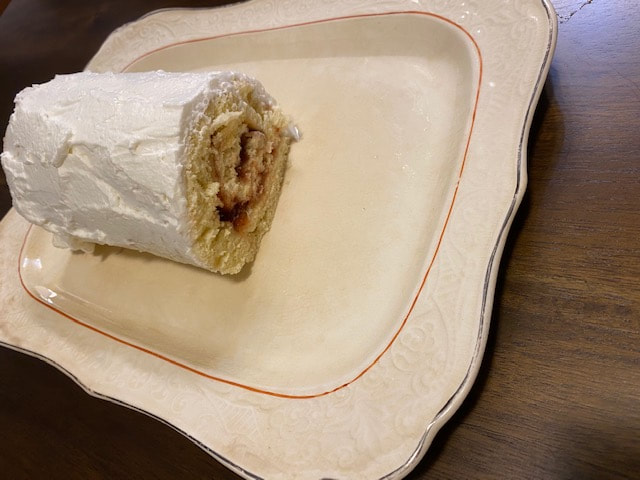
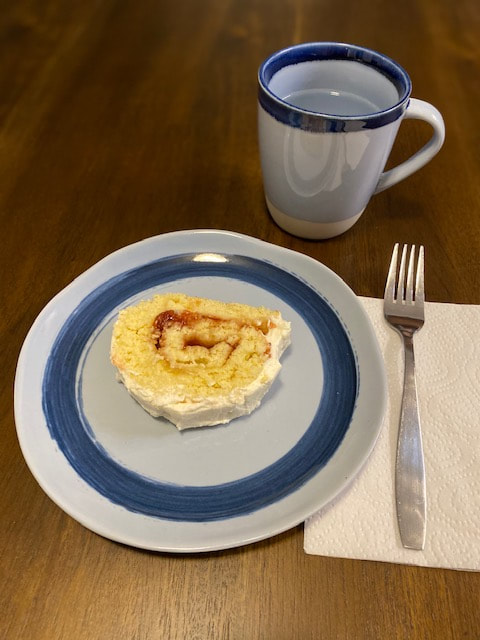
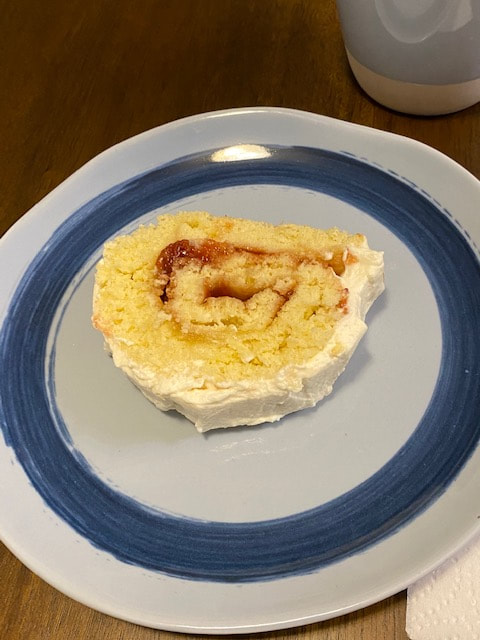
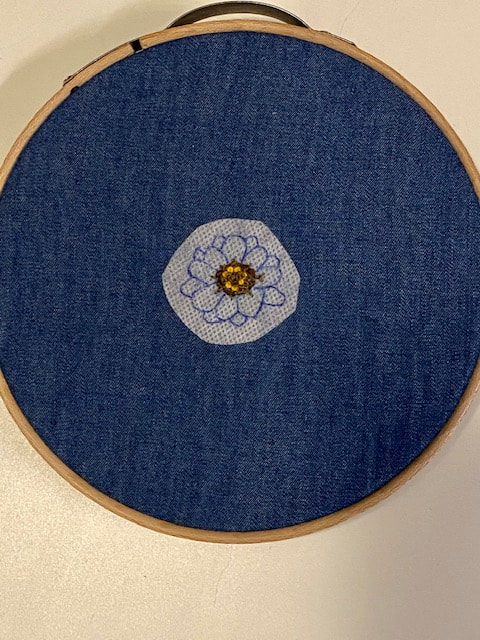
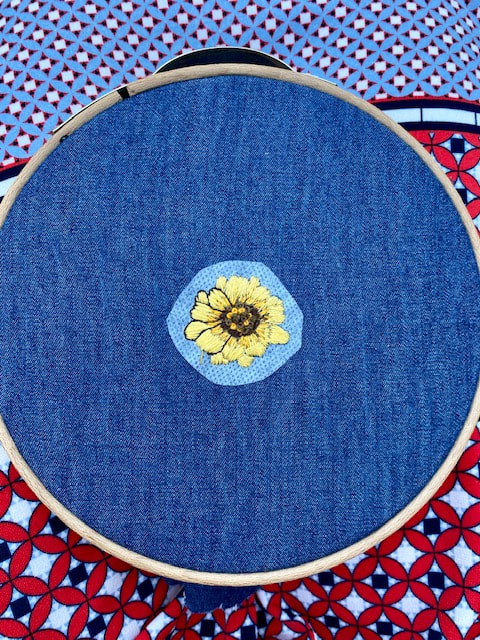
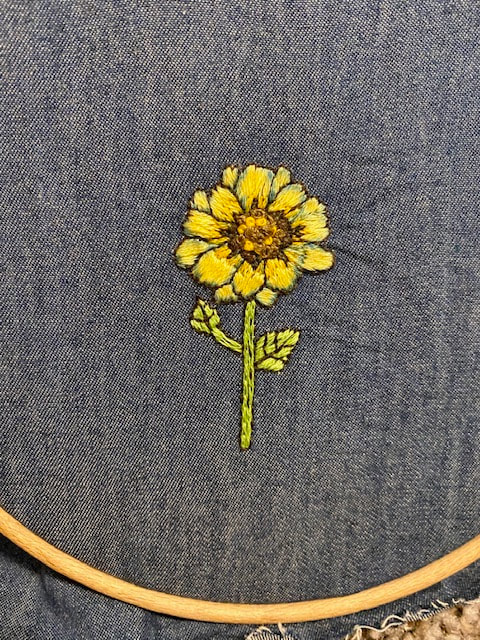
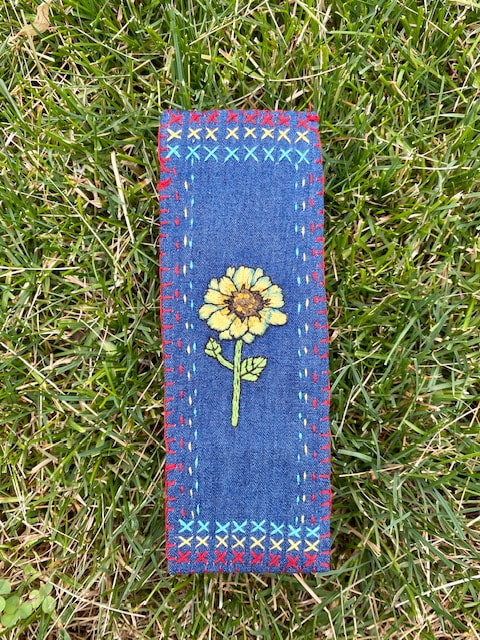
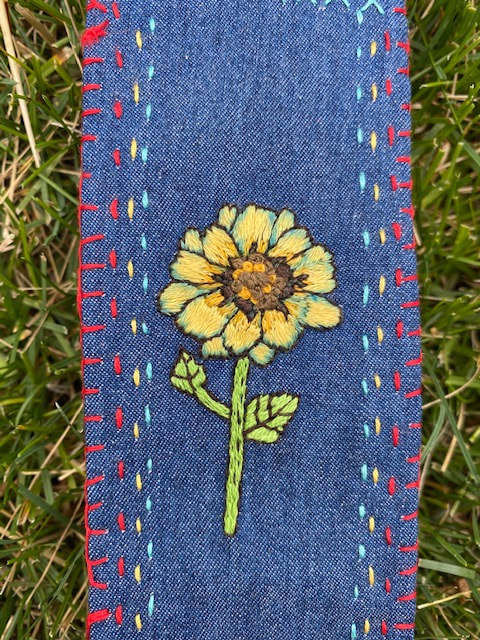
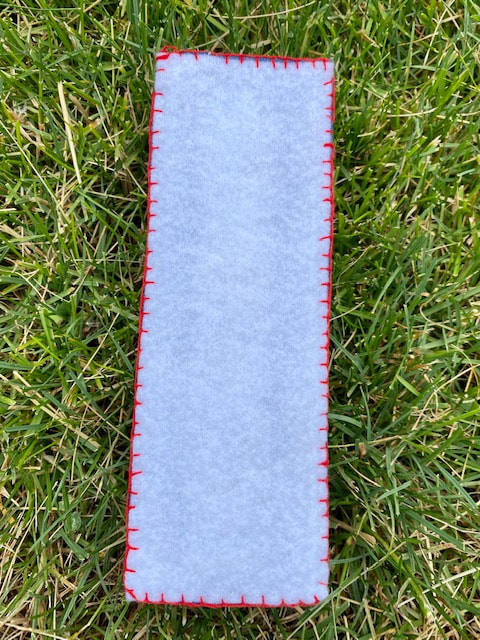
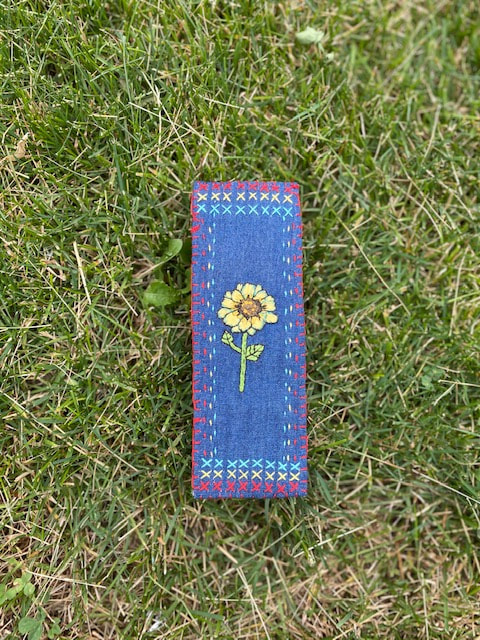
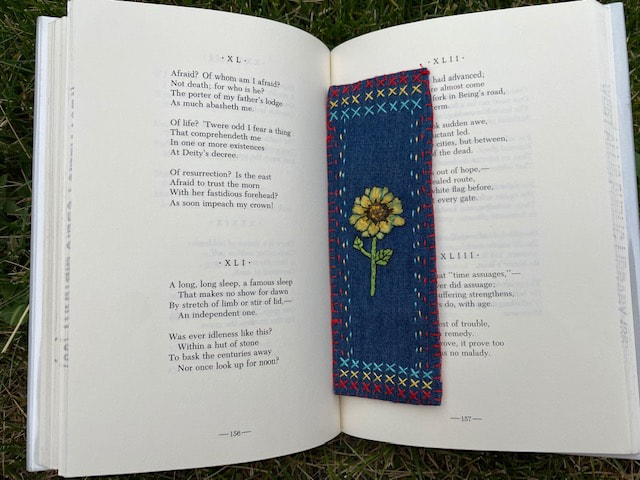
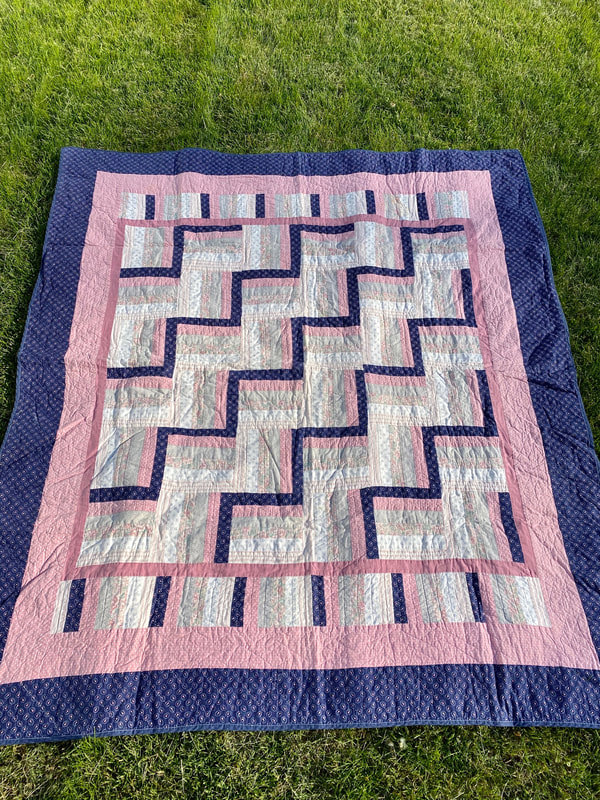
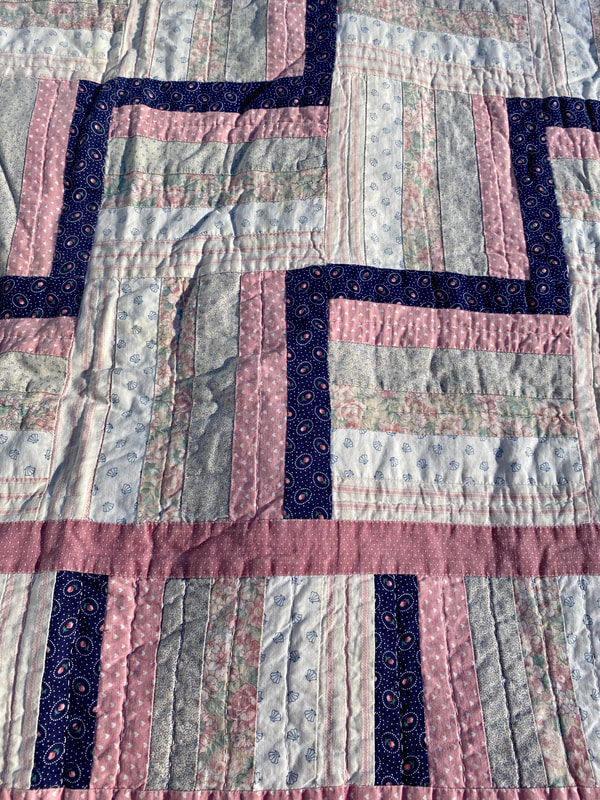
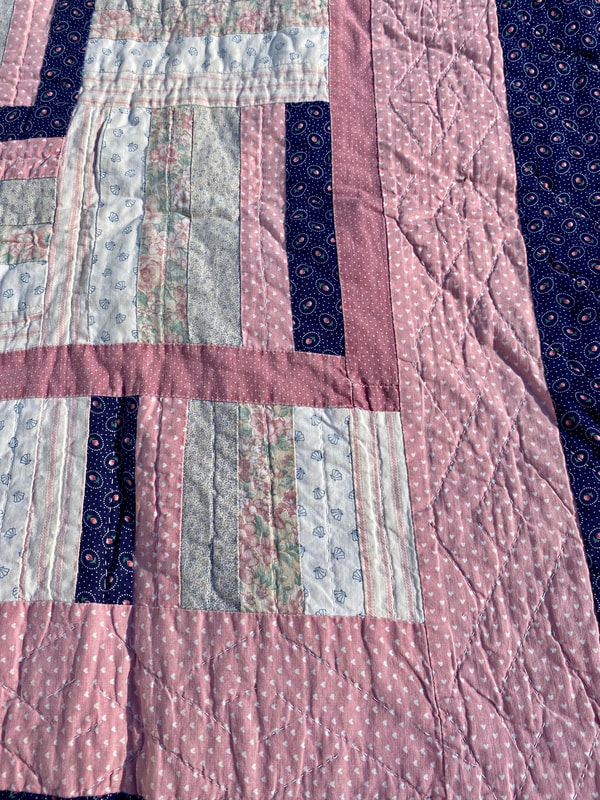
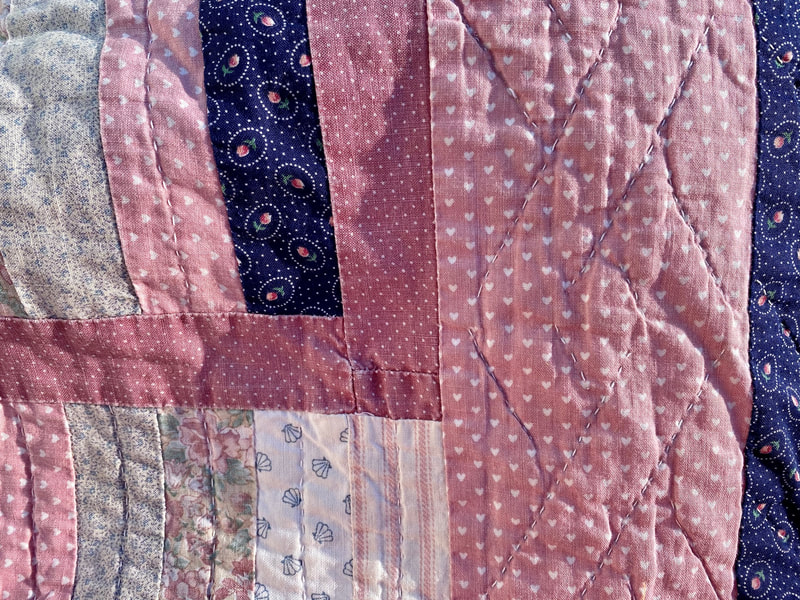
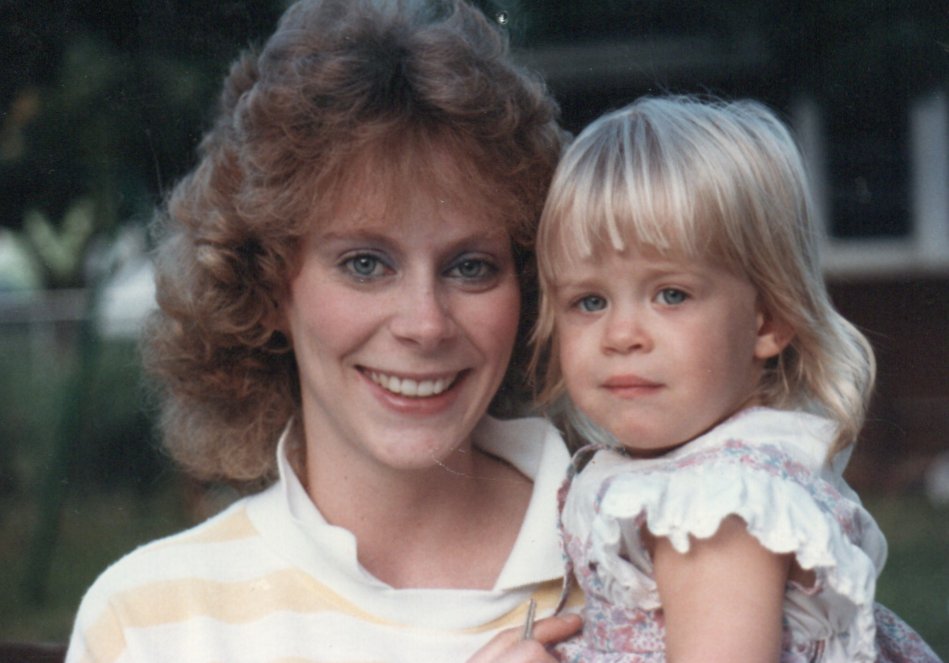
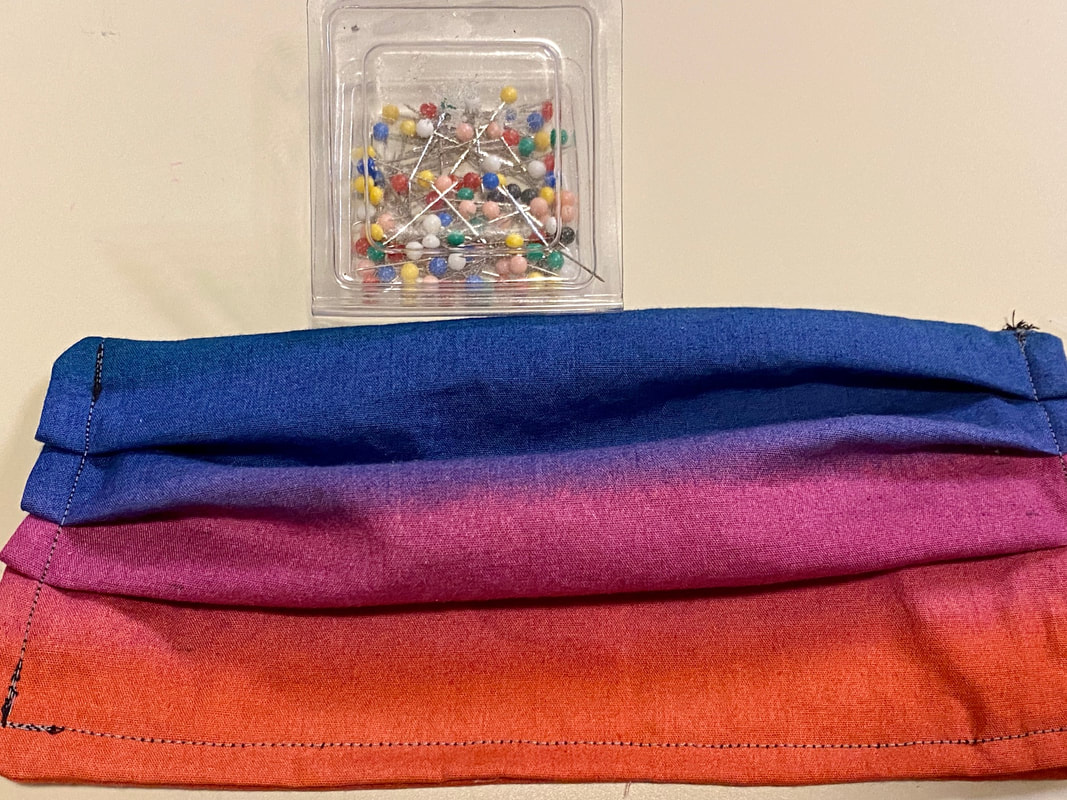
Jelly rolls, also known as Swiss cake rolls or yule log cakes, arrived on the culinary scene in the 1850s and have only grown in popularity since then. Most of us born at the end of the 20th century or later have snacked on processed versions of this dessert such as Little Debbie or Twinkies, but have never eaten a homemade jelly roll. This dessert from yesteryear looks elaborate, but it’s easy to make and simply decadent! 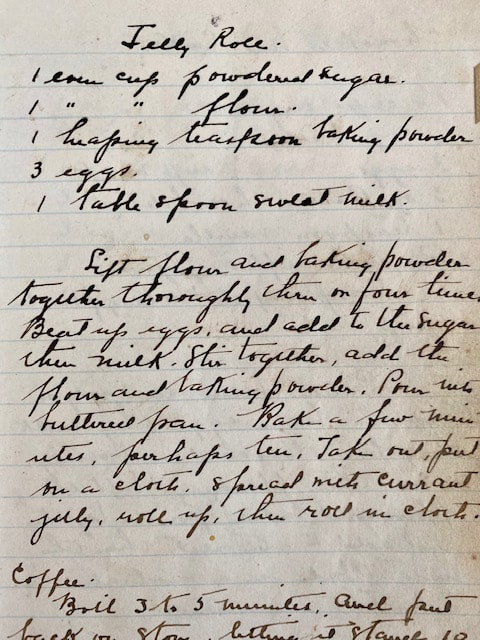 I’ve modified Mrs. Williams’ recipe slightly to add missing information and to make the process of rolling up the cake easier. She directs the baker to remove the cake from the baking sheet and roll it up on a clean cloth. When I did this, the cake stuck to the cloth. I prefer baking the cake on buttered parchment paper because it rolls up easily. The original recipe uses currant jelly as filling for the cake, but any flavor of jelly or even frosting will work. You’ll notice the original recipe calls for sweet milk, which is an old-school baking term for whole milk. Sour milk, on the other hand, is what bakers used to call buttermilk. My version of the recipe uses the term whole milk since we don’t say sweet and sour milk anymore. To make this recipe, you’ll need: - 1 even cup of powdered sugar - 1 even cup of flour - 1 heaping teaspoon of baking powder - 3 eggs - 1 tablespoon of whole milk 1. Preheat the oven to 350° F. Line a baking sheet with parchment paper. Butter the parchment paper liberally. 2. Sift the flour and baking powder together thoroughly, at least three or four times. 3. Beat the eggs and add them to the powdered sugar. Then, add the whole milk and stir it all together. 4. Add the flour and baking powder to the mixture. 5. Pour the batter onto the buttered parchment paper on the baking sheet. Use a spatula to smooth the batter so it’s thin and flat. Your cake will roll more easily if it has a smooth surface and consistent thickness. 6. Bake the batter for about 7 minutes. 7. Remove the cake from of the oven and use the parchment paper to lift it off the baking sheet. 8. While the cake is still warm, spread it with jelly and roll it up in a log. If the cake cracks as you go, add more jelly and keep it rolling! Set the cake roll on a plate or platter. 9. Cut the ends of the cake roll off so they’re uniform. Sprinkle the cake with powdered sugar or cover it with a whipped cream topping or frosting for extra deliciousness! Are you sick of your mom jean shorts and 2020 in general? Take a scissors and cut them up! Don’t miss a page this summer with an eclectic, embroidered bookmark made from yesteryear’s denim. To complete this project, you’ll also need: -Extra firm fusible interfacing - DMC embroidery floss in a variety of bright colors - A piece of felt for the reverse side of the bookmark Now you’re ready to make a bookmark with personality in just 4 easy steps: 1. Embroider a scrap of denim to your heart’s content. Anything goes! Make sure to stay within a 2” by 6” rectangular area. 2. Cut a 2” by 6” rectangle of felt and another rectangle of the same size of fusible interfacing. 3. Follow the instructions on the fusible interfacing packaging to iron it to the reverse side of the embroidered denim.  4. Pin the raw edges of the denim behind the interfacing. Use the blanket stitch to sew the denim to the felt. 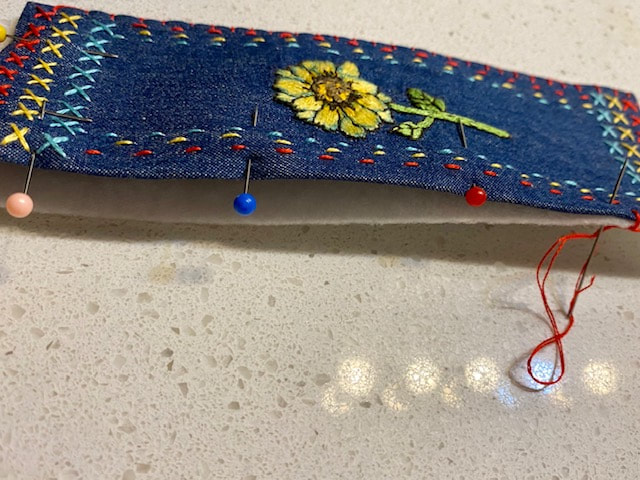 Now, that’s a bookmark! Happy first day of summer, everyone! In my early elementary school years, my mom made a quilt for me. I chose my favorite fabrics with pretty, pastel prints. She cut the pieces with a rotary cutter, pinned them together, and sewed them in place. Then, she joined the blocks together in neat rows and added borders. Finally, she quilted the entire piece by hand with her tiny, even stitches! I used to tell her that I never wanted to grow up and move away with my quilt. That’s why there’s a tiny heart stitched on the quilt. “If you ever miss me when you’re older, find the heart,” my mom said. “I’ll always be there for you.” 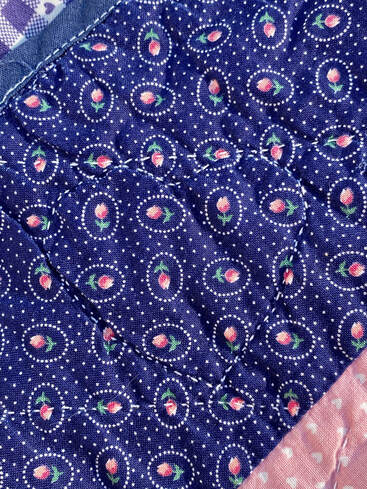 Mom, I wish that I could be with you on Mother’s Day. Thanks for a lifetime of love. You’ve always supported my dreams and believed in me. Thanks for giving me a happy and creative childhood! I love you. I would like to share Froedtert’s tutorial for how to make a cloth face mask for protection from COVID-19 with you. I followed the instructions and sewed a mask in under an hour. I did just one thing differently. I used ribbons for ties instead of sewing straps. You could also use elastic or strips of stretchy tee shirt material for ties. If you can’t sew, try using staples, super glue, or hot glue to secure the seams and pleats of your mask.
If you have extra materials and time on your hands, consider making masks for healthcare professionals and essential workers in your area. They’re most certainly facing protective gear shortages. Let’s go, makers! Take extra care and stay safe, my friends. |
Hello, there!
Thanks for visiting! Archives
February 2024
Categories |


 RSS Feed