|
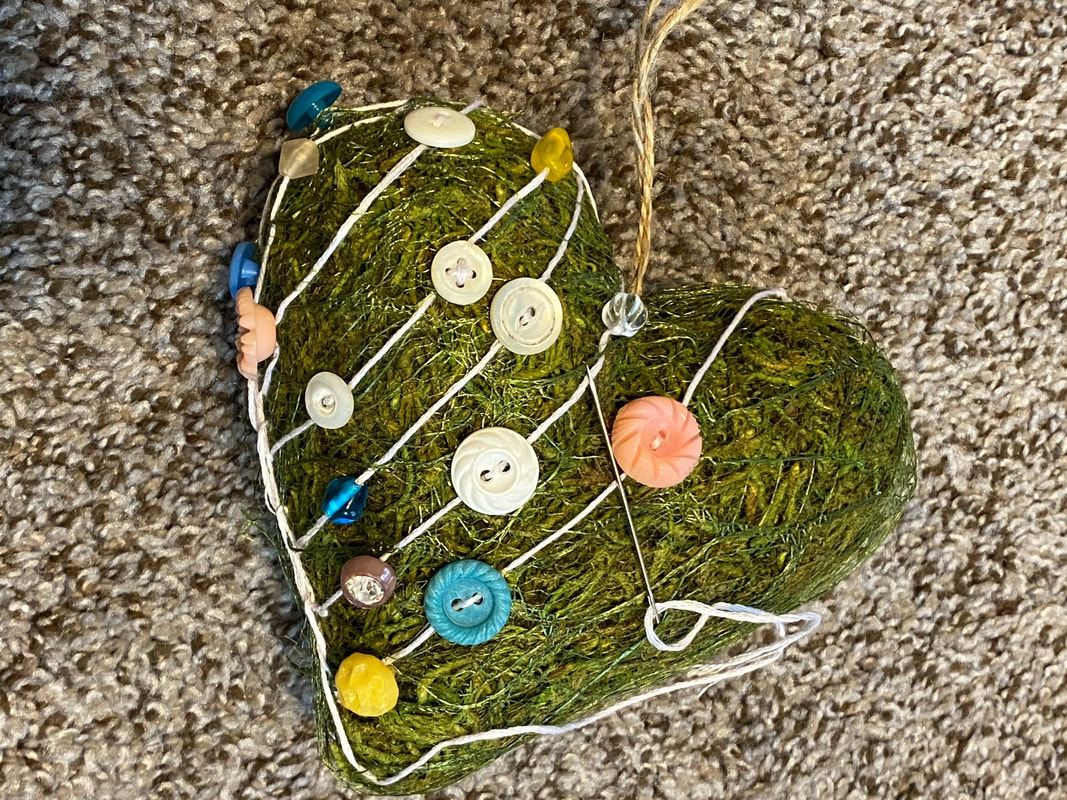
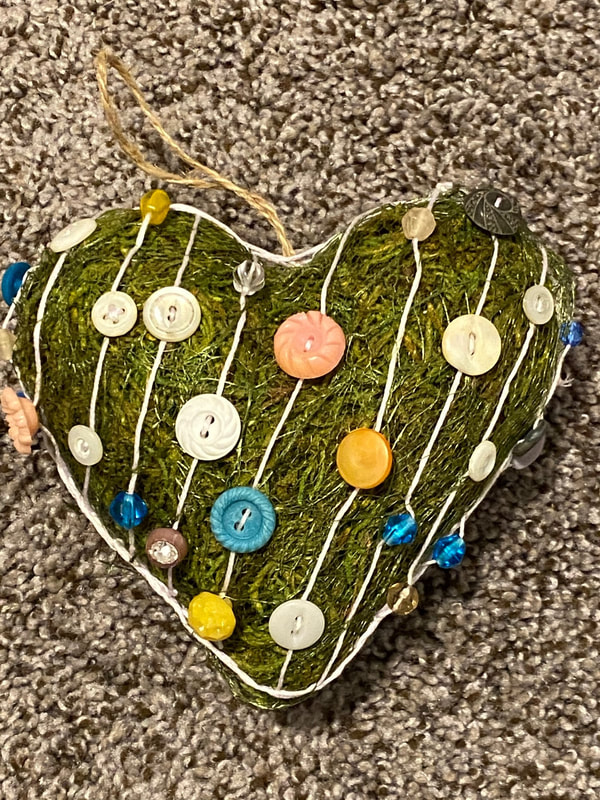
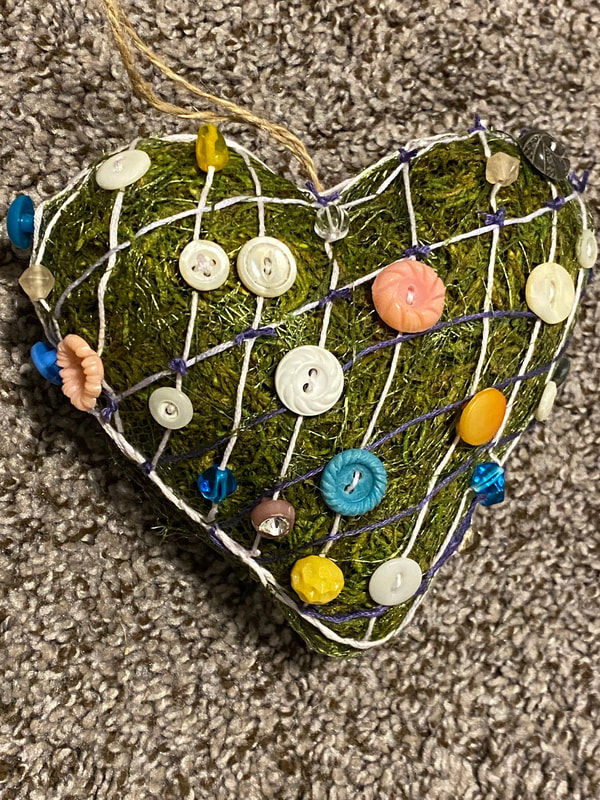
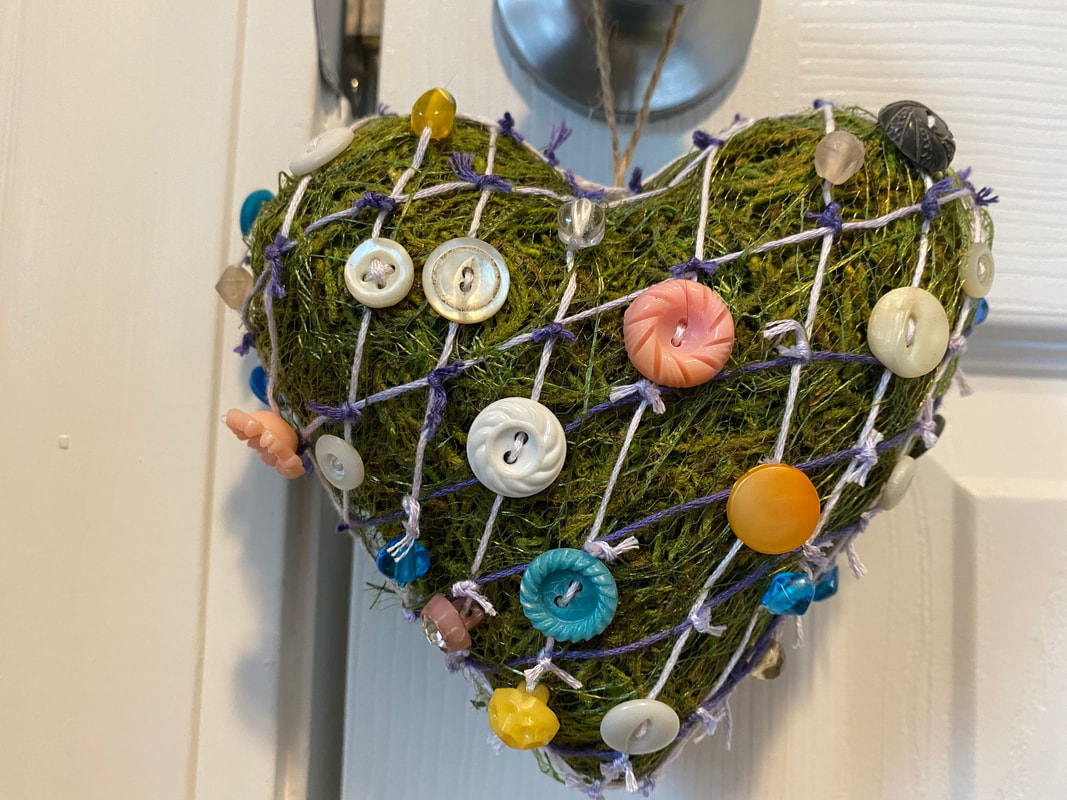
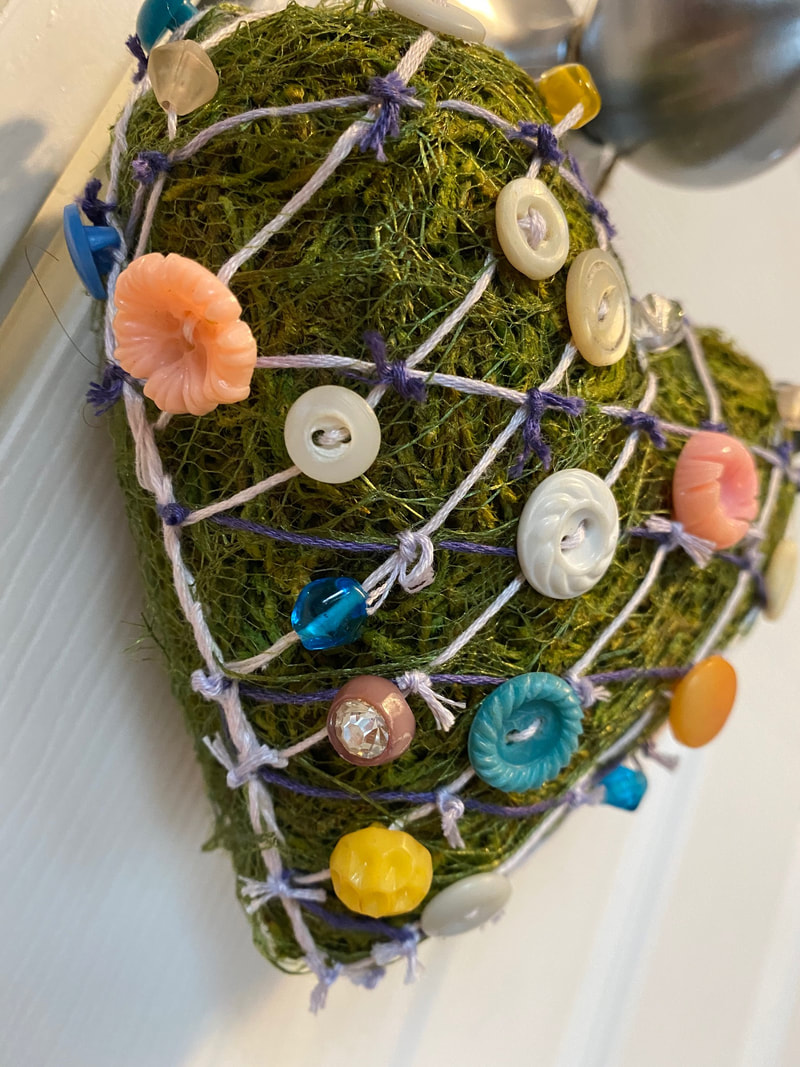
The past few weeks have been turbulent ones. It’s devastating to see the COVID-19 virus sweep the world and claim more lives every day. With self-quarantining in place and schools and businesses closing, life as we know it has come to a halt. Let’s face it, social distancing makes us all stir crazy! Since I’ve been inside more than I am normally, I’ve been passing the time making things. Doing something creative always centers me. This project celebrates the first day of spring, a season of restoration and renewal. Even though there is a long journey ahead of us, we’ll eventually recover and flourish. Let’s hold onto our hope, even in difficult times. Mother-of-pearl, rhinestone, celluloid—I chose a variety of delicious pastel vintage buttons for this project. I used DMC embroidery floss in springy shades to secure the buttons to a moss heart. Then, I wove thread in the opposite direction to add a bit of visual interest. Finally, I tied knots in contrasting colors over places where two threads meet for an extra pop of color. If you can’t find a decorative moss heart for sale or would prefer to use a different shape for this project, you can make your own base by gluing crafting moss to a papier mâché ornament and securing it with netting. I hope you give this project a try. It’s quick and adds a little brightness to your home. Here’s to better times ahead. For now, it’s an uphill battle and we’re all in this together. Let’s acknowledge healthcare, delivery, and retail workers and teachers for their dedication. If you can, purchase gift cards from small businesses to help sustain them while they’re closed or experiencing a low volume of sales. Urge your representatives to create and support policies that will help us recover our health and economy. Reach out to your loved ones and never take life for granted. We’re all vulnerable. Let’s be kind, helpful, generous, and creative.
0 Comments
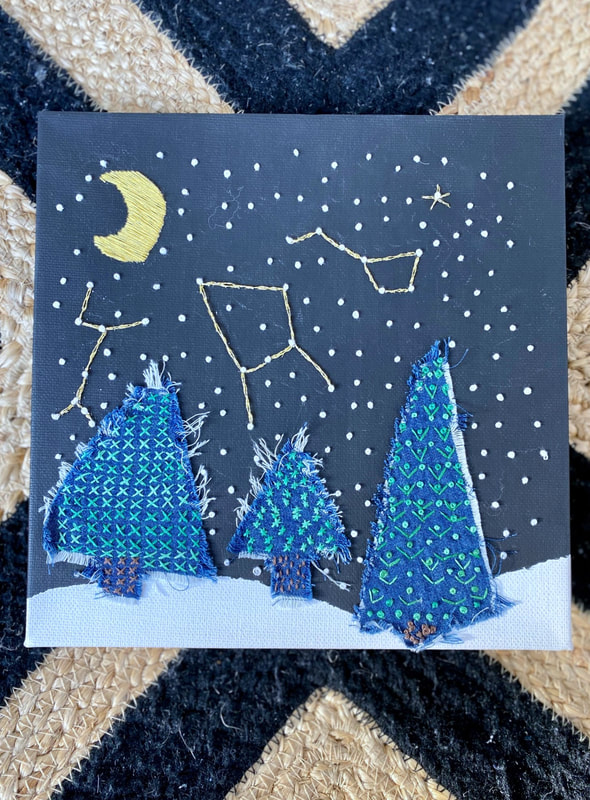
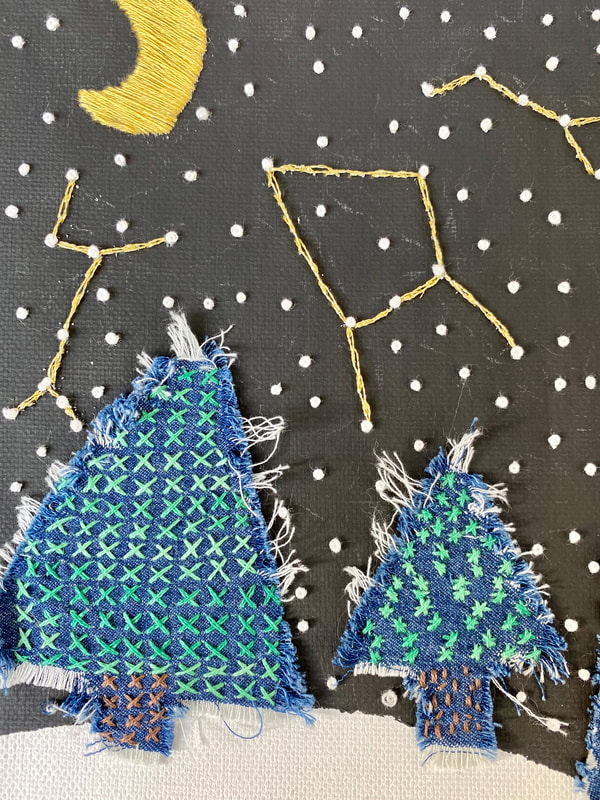
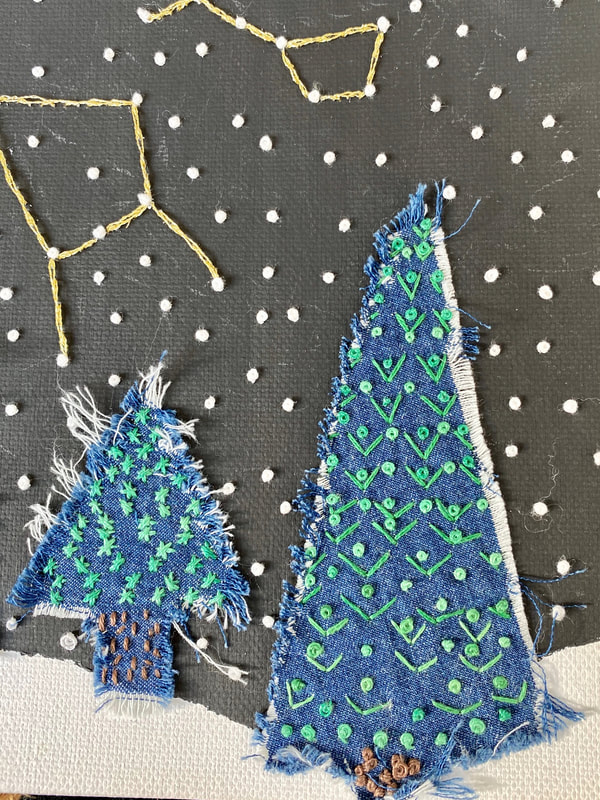
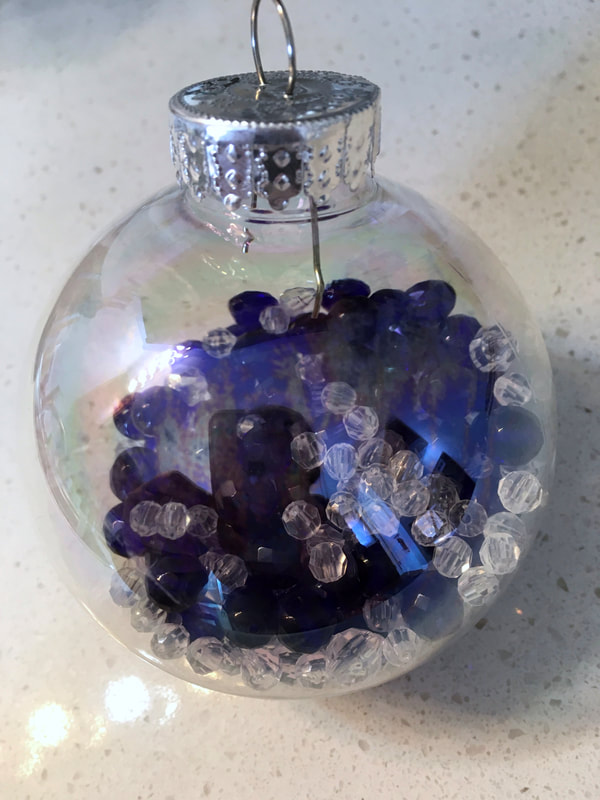
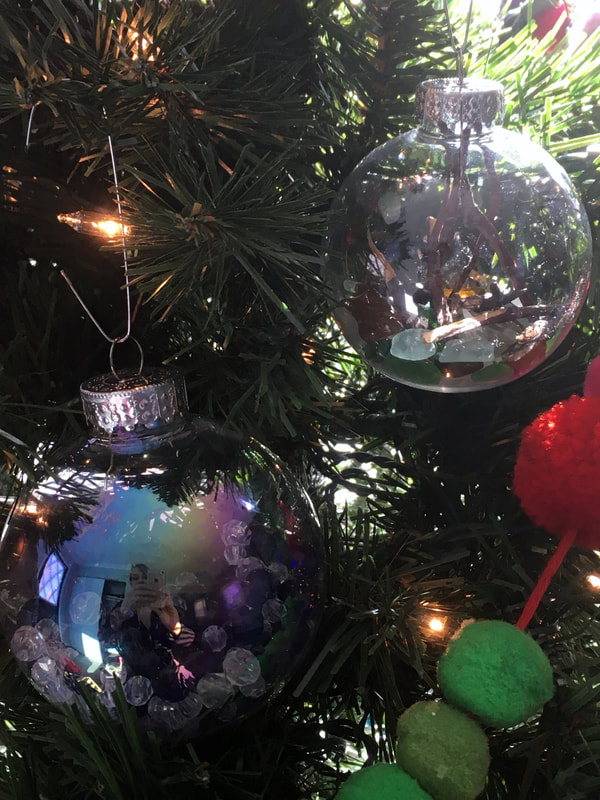
The last moment of light on a winter night is a beautiful thing to behold. The sky is almost the color of India ink and the silhouettes of objects take on a cobalt blue hue. Languid shadows dance on the snow. Constellations twinkle upon the arrival of velvety darkness. As the stars wink at me, I’m flooded with a sense of peace. When I contemplate how vast and wondrous the galaxy is, my problems seem so momentary and inconsequential. A starry sky gleams with hope and possibility. This is my first project of the new decade. It features acrylic paint, upcycled denim, and embroidery. I’m looking forward to creating new designs and finding more unexpected ways to reuse items. Here’s to you! The sky is the limit in 2020. The holidays are an especially busy time of the year. Fortunately, creativity doesn’t take an eternity. If your time budget is under 5 minutes, this project is for you! Create one-of-a-kind ornaments that showcase your hobbies and collections in the blink of an eye. Glass or plastic craft ornaments come in a variety of sizes and finishes. Simply open the ornament and fill it with tiny treasures of your choice. Close the ornament securely and use it to trim your tree! The first ornament that I made holds twigs and beach glass that I collected on the shores of Lake Michigan. The second one contains vintage Czech crystal beads. I still have a few empty ornaments to fill before Christmas arrives. I might fill them with:
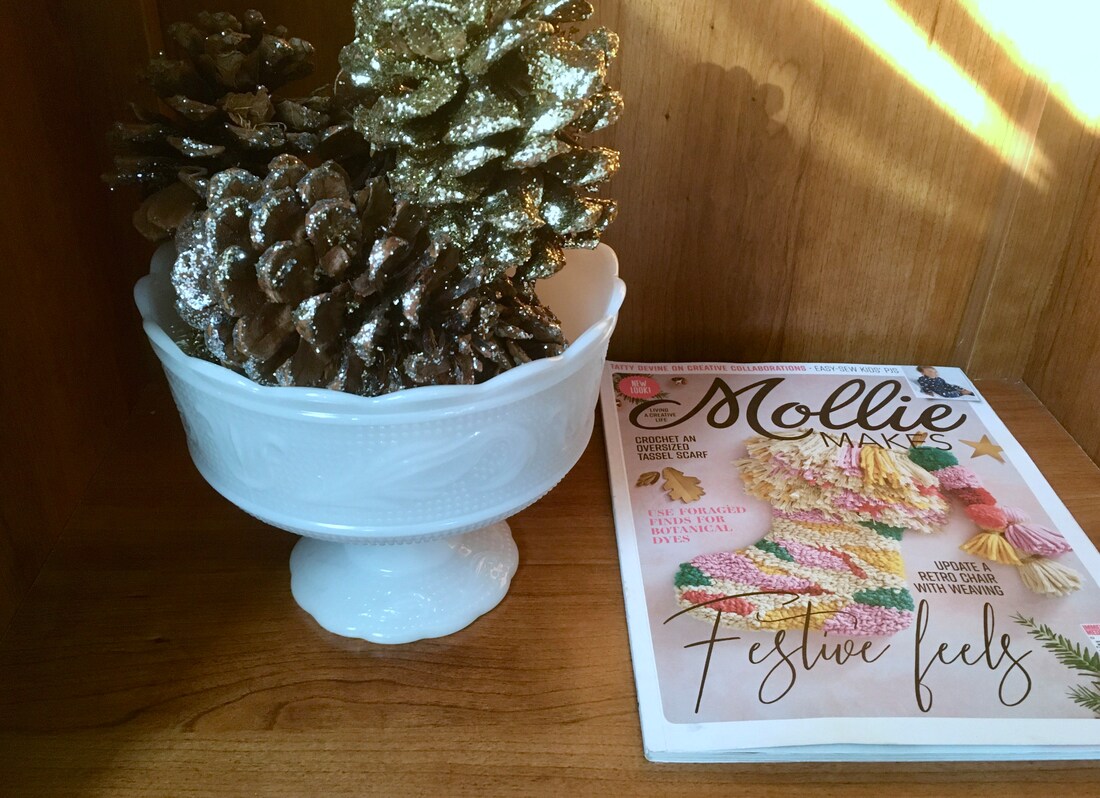
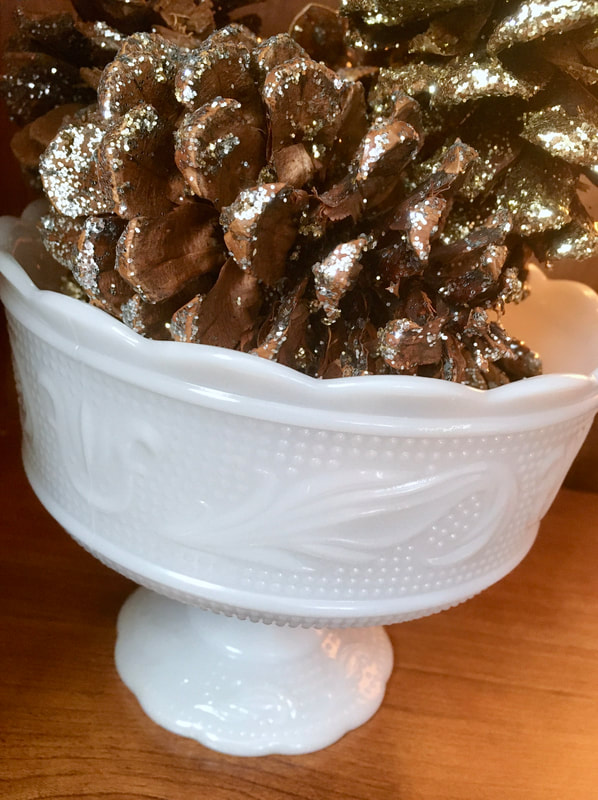
I hope you try out this project and make it your own. The possibilities are endless! If you’re interested in decorating an entire tree with a maker theme, please see my post from last winter for inspiration. May the upcoming days be magical and creative for you and your loved ones! Happy holidays! Neither transparent nor opaque, milk glass has won its way into my Midcentury-loving heart. I love its marvelous translucency and how well it plays with all types of décor due to its neutral color. Although it was manufactured long before then, milk glass surged in popularity in the 1950s. Many of the pieces that I’ve collected are from that decade. I use milk glass to decorate more often than I use it to serve food. Milk glass pieces filled with seasonal items add interest to every room. Here’s how I use milk glass to add glitter and glitz to my home for the holidays: Merry Christmas to you! I hope you have a bright, beautiful, sustainable holiday season and consider thrifting for your gifts and decorations. You might even find some vintage milk glass!
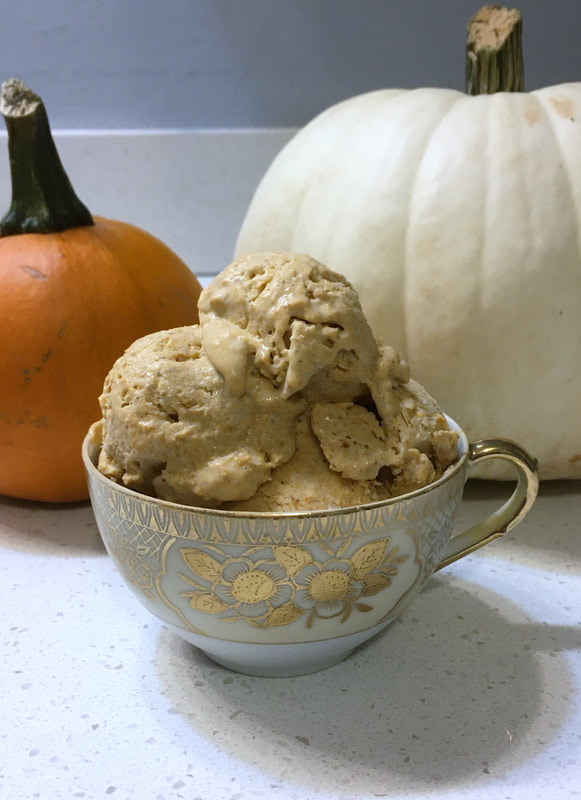
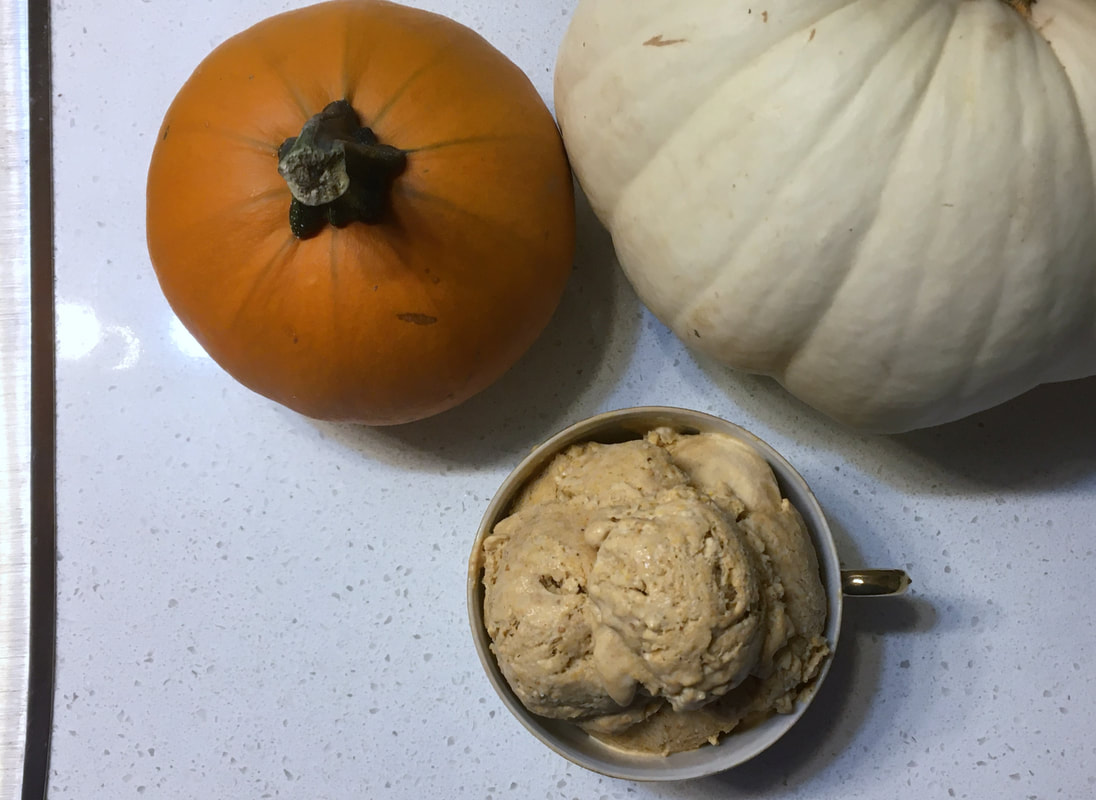
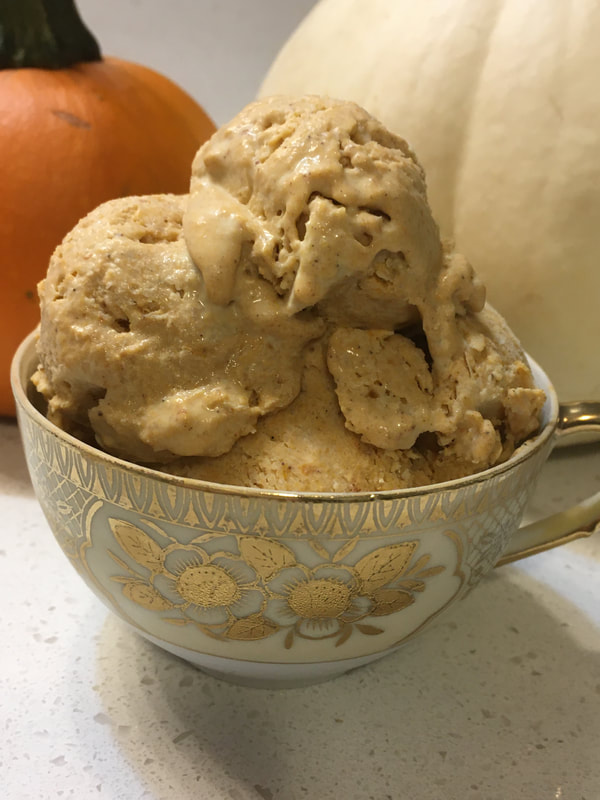
If you’ve been under the impression that making ice cream requires a bunch of machines, you’re mistaken. After paging through Mrs. Williams’s recipe book, I realized that making ice cream is as easy as pie. A flapper would have found owning piles of kitchen gadgets to be a complete doozy! All you need is your freezer to make this classic recipe with the texture of Italian ice. 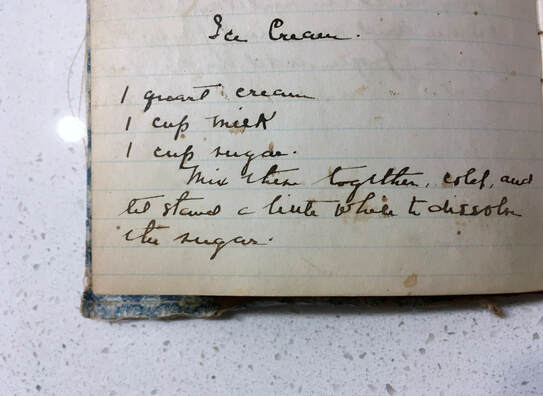 Here's the original recipe:
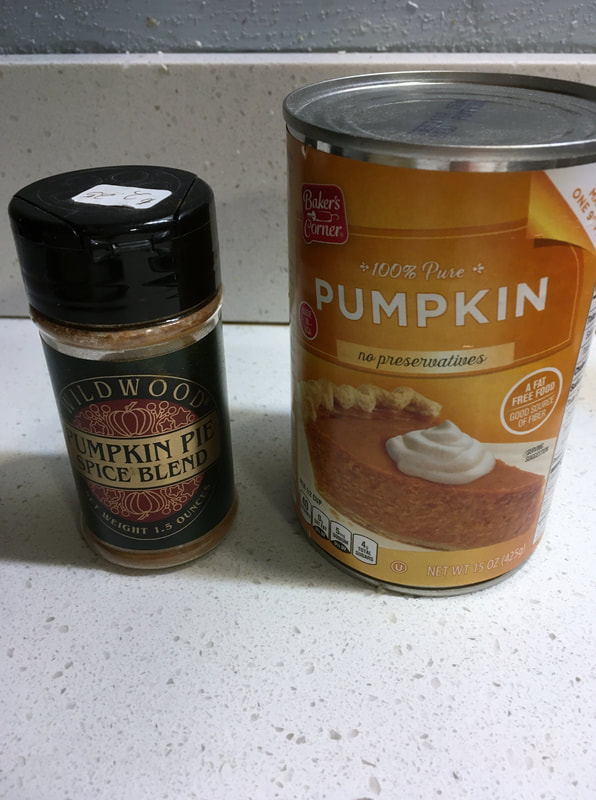
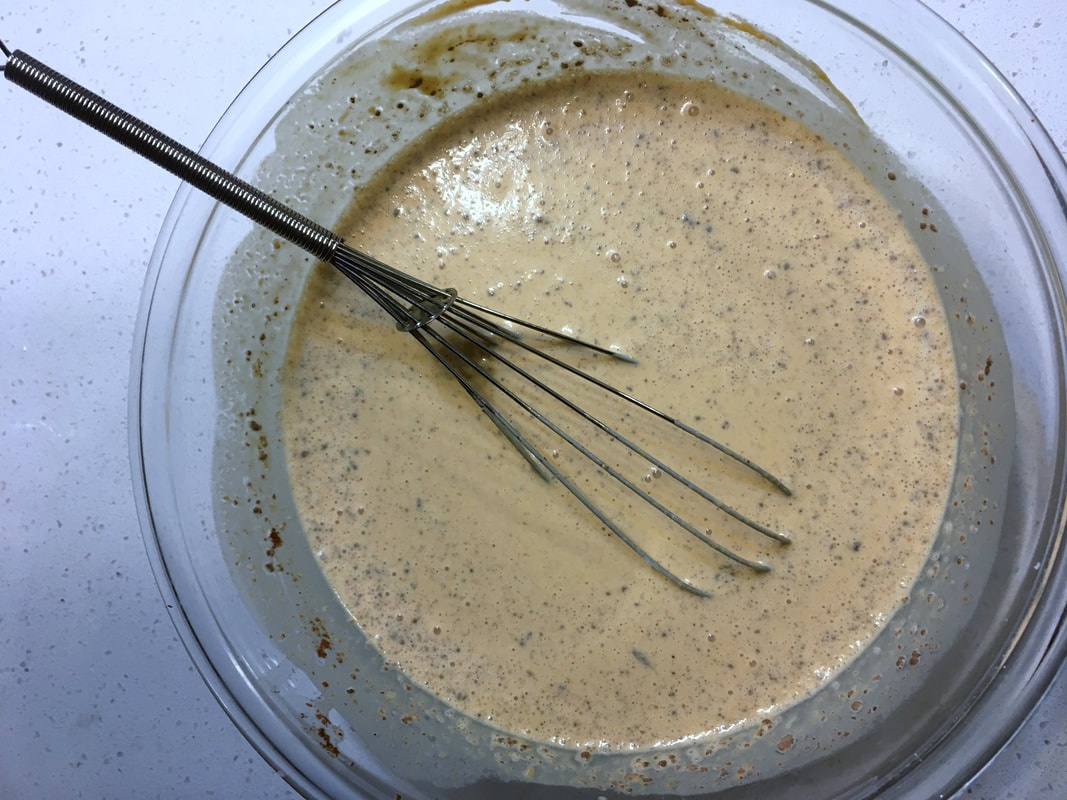
Below is my modern reinterpretation with a fall twist. My recipe yields half the amount of ice cream as the original.
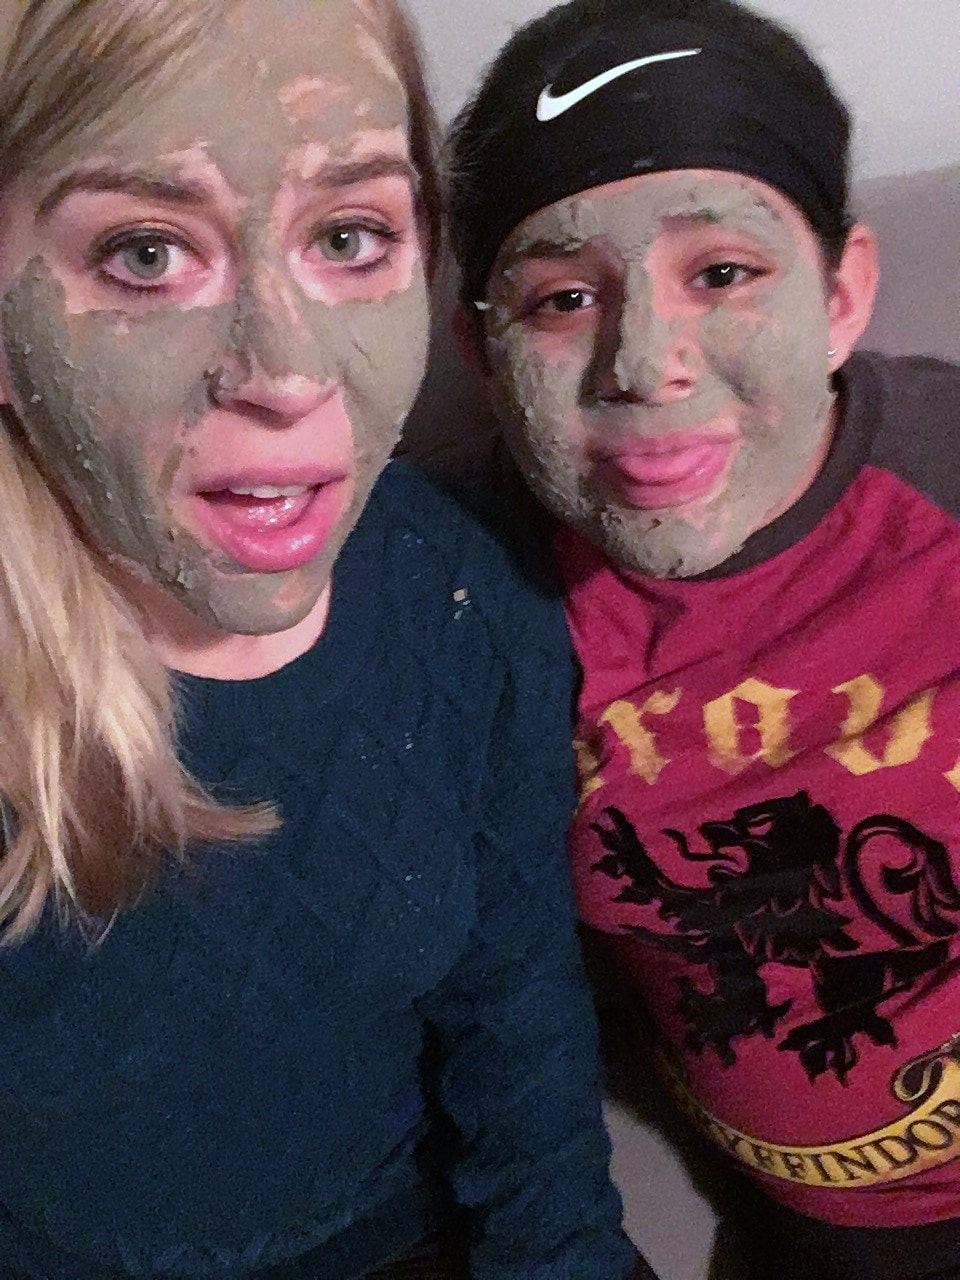
It’s time to upgrade your self-care Saturdays and Sundays! Baby your stressed-out skin with this fragrant, easy-to-make clay mask with just a few ingredients. You’ll need the following items to whip up this recipe:
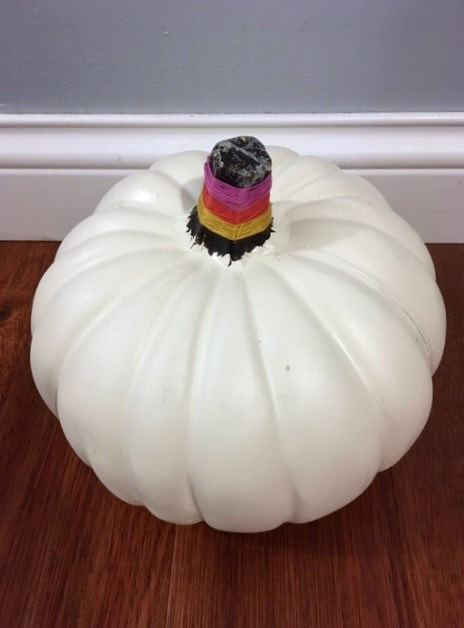
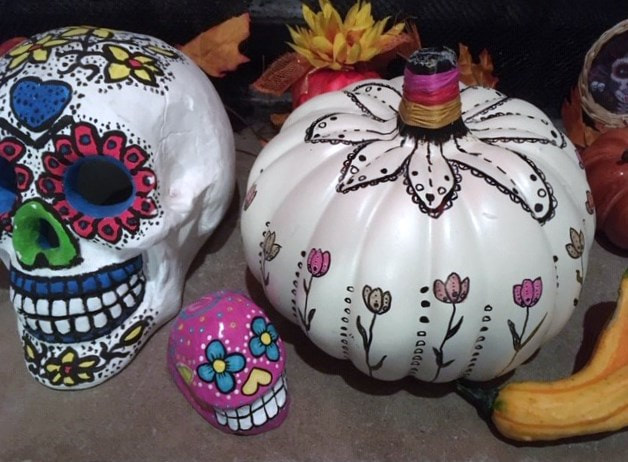
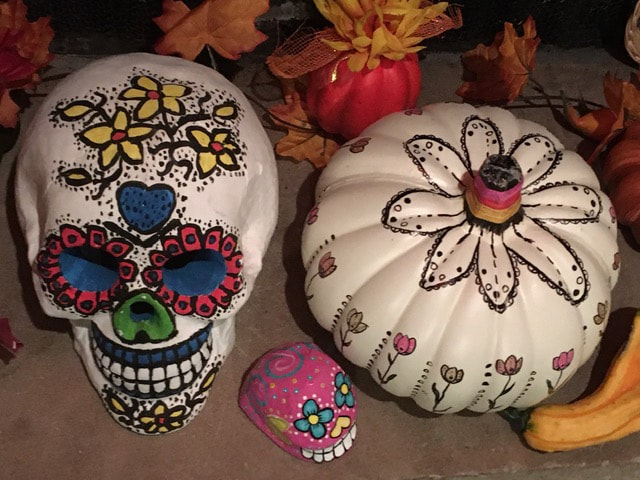
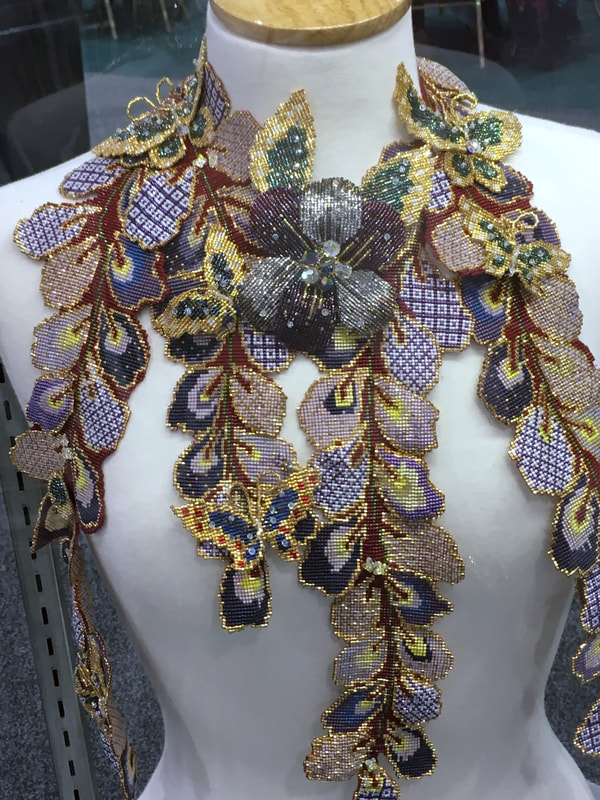
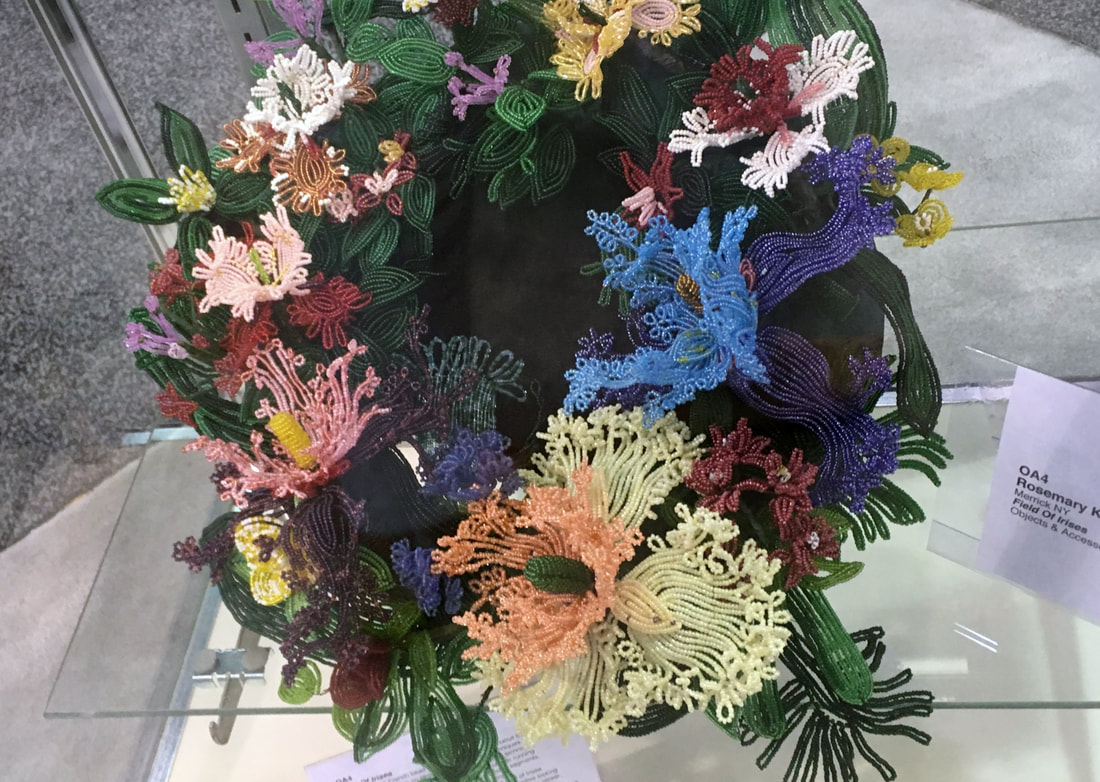
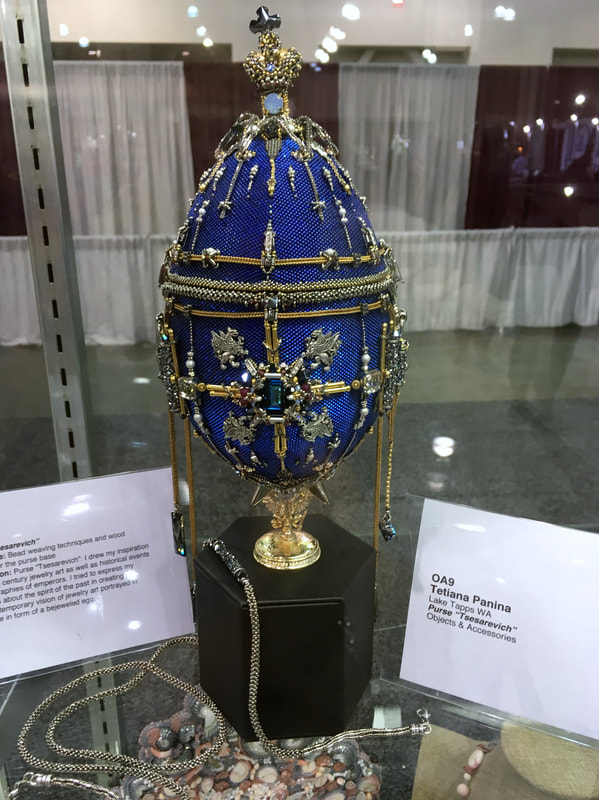
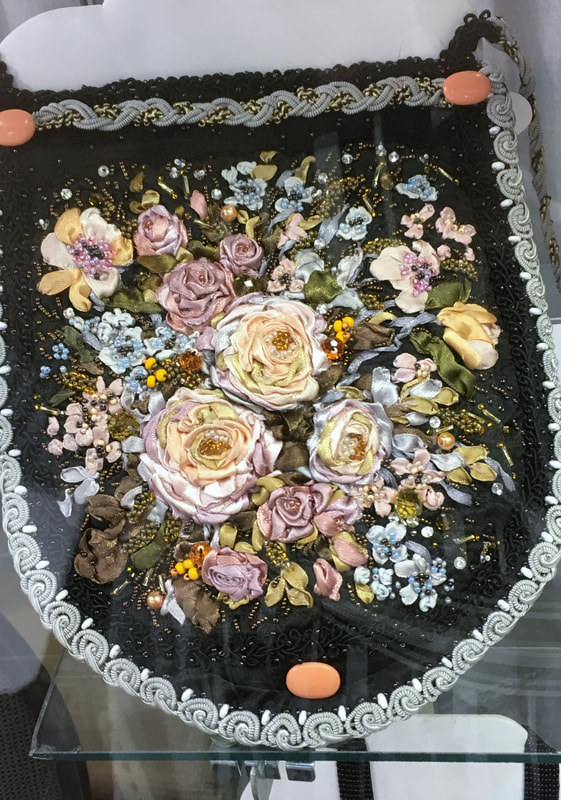
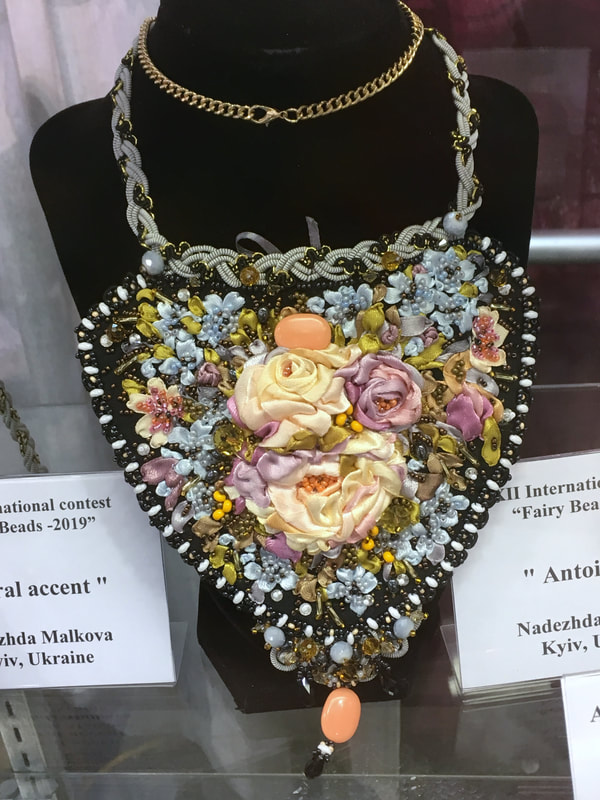
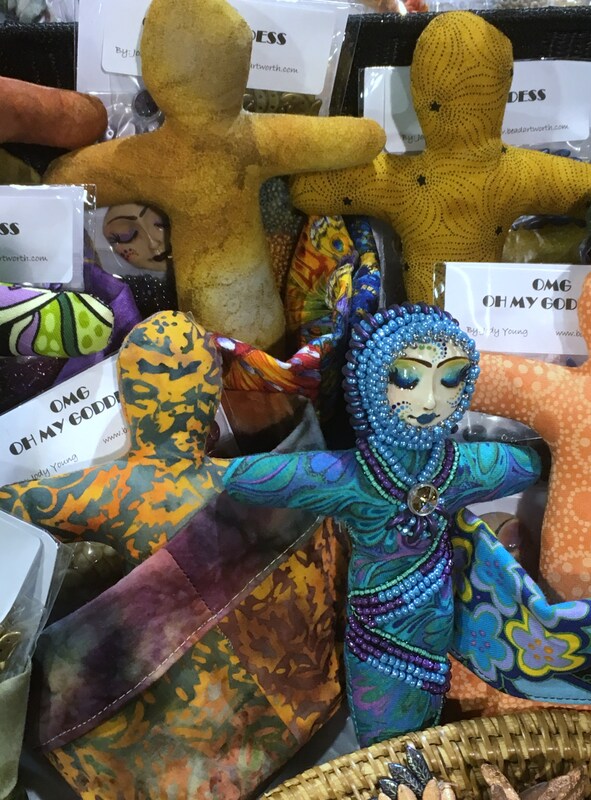
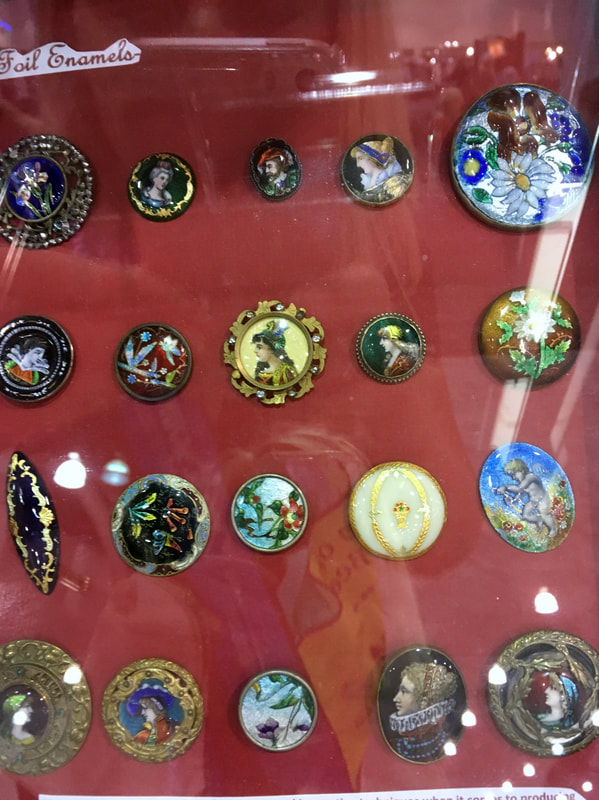
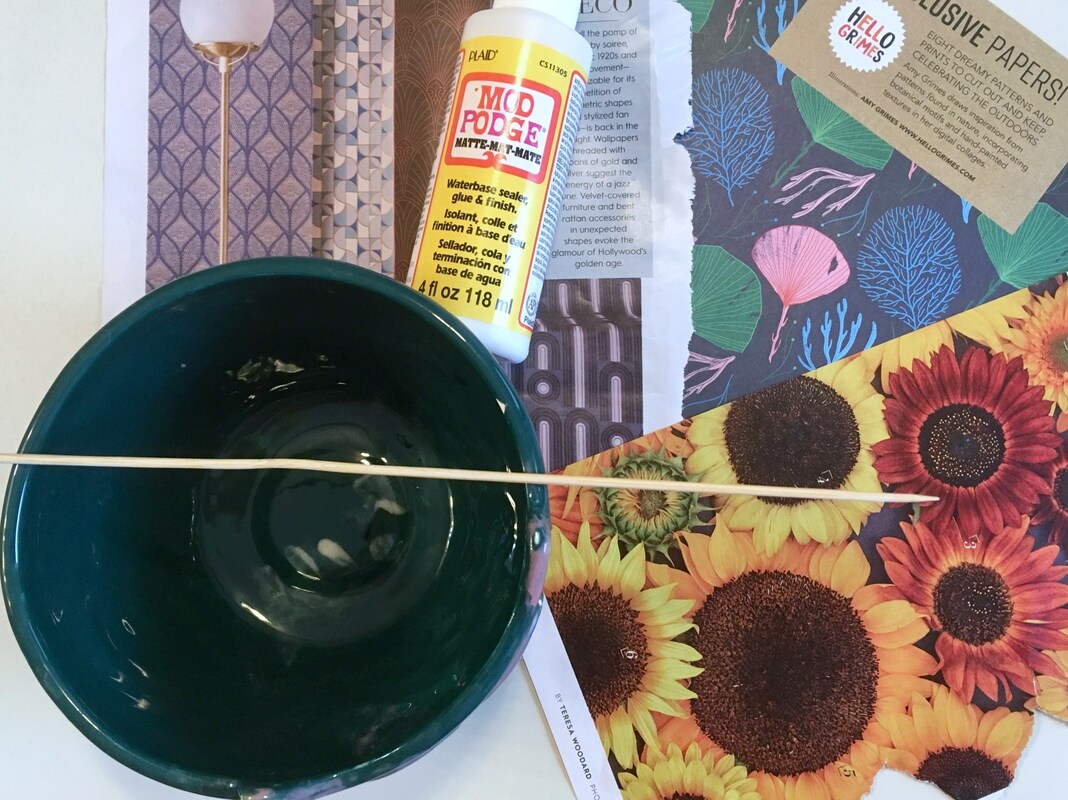
1. Make a mug of green tea and let it cool completely. 2. Measure and add the following to a glass mixing bowl: 2 tablespoons of green clay, 2 tablespoons of green tea, 1.5 teaspoons of tea tree oil, and 3 drops of lavender essential oil. Mix the ingredients together to form the mask. 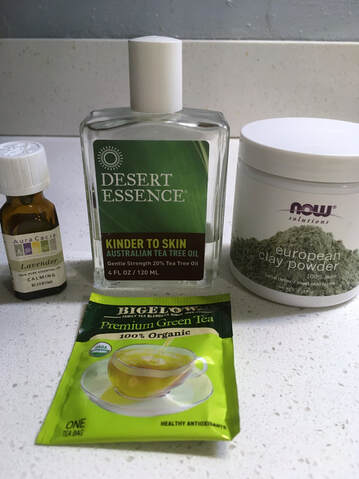 3. Apply the mask to your face. Leave it on your skin for about 20 minutes or until the mask dries. Wash off the mask and enjoy your refreshed complexion! Oh, my gourd, it’s officially fall again! Go faux and folksy this year by embellishing a crafting pumpkin with items from your maker stash. Instead of having your creation go to mush in a few weeks, you’ll be able to enjoy your jack-o’-lantern for many Halloweens. Here’s a list of items you’ll need for this project: - A crafting pumpkin - Sharpie permanent markers - Acrylic paints - Embroidery floss in 3 complimentary colors Here’s how to guild your gourd: 1. Wrap the pumpkin’s stem with embroidery floss by looping the thread in a circle around the stem, pulling the thread through the inside of the loop, and tightening the thread. Repeat this process until bands of thread in different colors cover the stem. 2. Draw a fabulous fantasy blossom around the stem with permanent marker.  3. Add whimsical wildflowers along the lower half of the pumpkin. 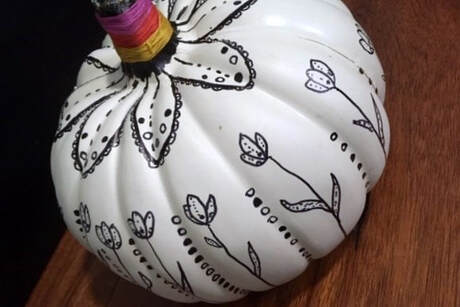 4. Add color to the flowers with acrylic paint and permanent marker. 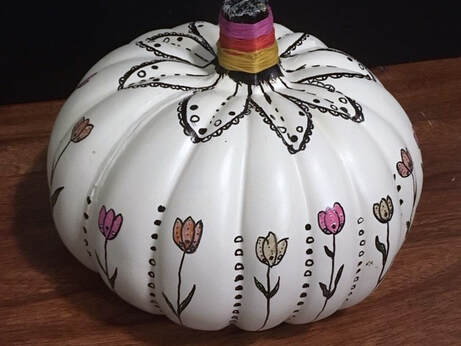 5. Enjoy your great pumpkin. If you don’t say boo, no one will know it’s fake! I attended the Bead and Button show for the third time this summer. My first time, I experienced sensorial overload. I was so dazzled that I didn’t budget my time well. The third time is the charm! I saw everything in the 2019 show. I’ve learned that there’s an art and science to getting the most out of an expo or trade show. Here are my top tips for maximizing your experience: 1. Dress comfortably! You can’t enjoy the moment if your feet ache or you’re shivering. Wear sensible shoes and dress in layers. 2. Begin with a quick scan of all the vendors and exhibits. Visit every booth and display in the show for 3 to 5 minutes. You’ll get an idea of everything that’s available to you. Mark your favorites on a map of the show and return to the exhibits and vendors for longer visits and some possible shopping! You can prioritize what interests you the most and plan out the rest of your time at the show. You’ll have no regrets! 3. Take plenty of notes and snap photos. With so many amazing sights to take in, don’t count on your memory to serve you later. Bring along a small notebook with a pocket. You’ll need a place to stash business cards for vendors and artists. Jot down names of techniques you would like to learn more about and contact information for people you would like to stay connected with. Capture any ideas you get for color schemes or projects inspired by the creative people and beautiful work around you. Take plenty of pictures for future reference. 4. Be true to your style and aware of your needs. Being mindful of the colors, materials, and techniques that you prefer helps you steer clear of buyer’s remorse. Also, keep in mind your time budget for the upcoming year. If you decide to buy supplies for a new technique, treat yourself to a book, class, or other educational materials to help you master this new skill. 5. Buy unique items! Rather than purchasing something you could find at any craft store, buy one-of-a-kind items that you can’t find anywhere else. Unique items fill the gap in your stash and give you a fresh take on how to use what you already have. Don’t skip out on something incredible! Here are photos from a few shows I've attended: What’s your favorite expo or trade show related to your hobbies? Please share your story below.  Even though most of my incoming mail arrives in electronic form, it still seems like my life is overflowing with paper. This project is a creative way to clean up your paper trail. Get ready to begin by collecting glossy magazine photos, beautiful card stock, and pretty papers that inspire you. Here’s a list of what you need to make this project:
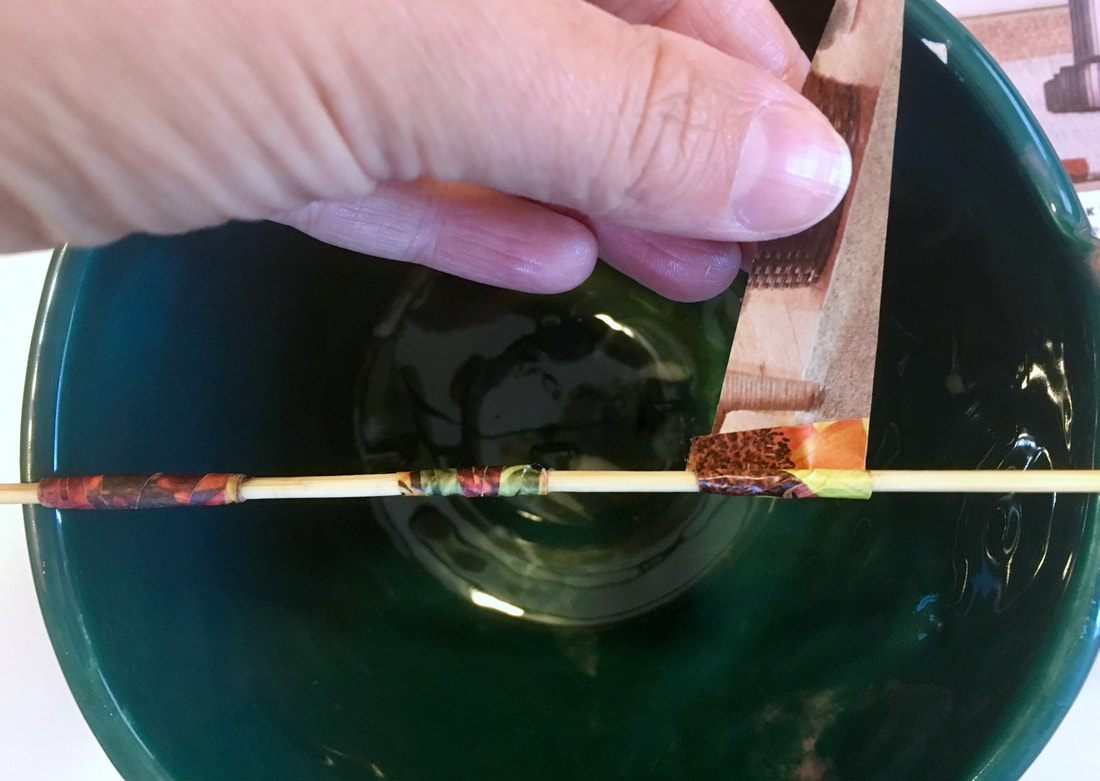
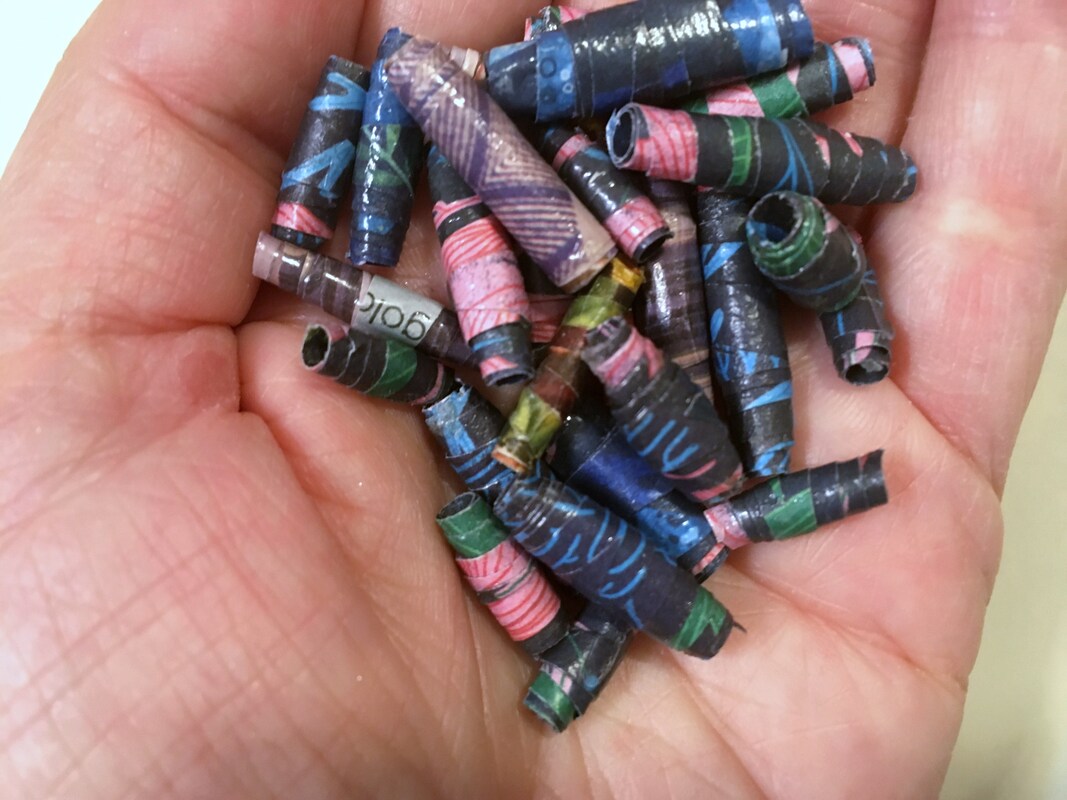
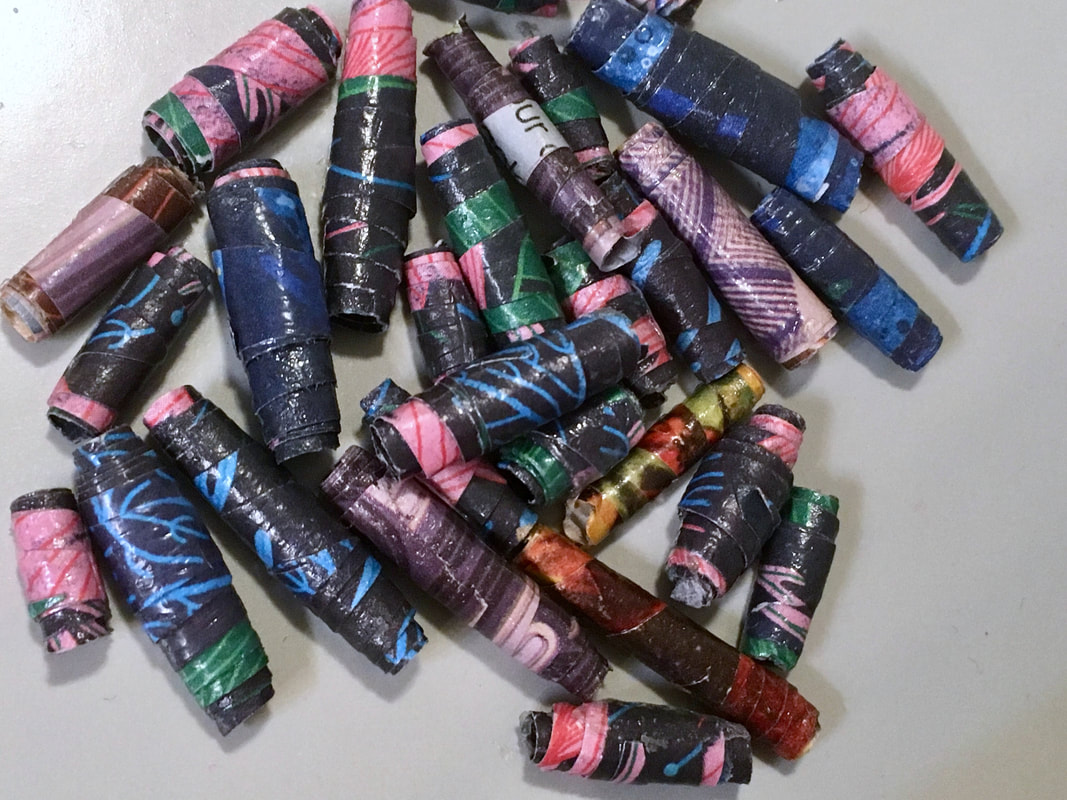
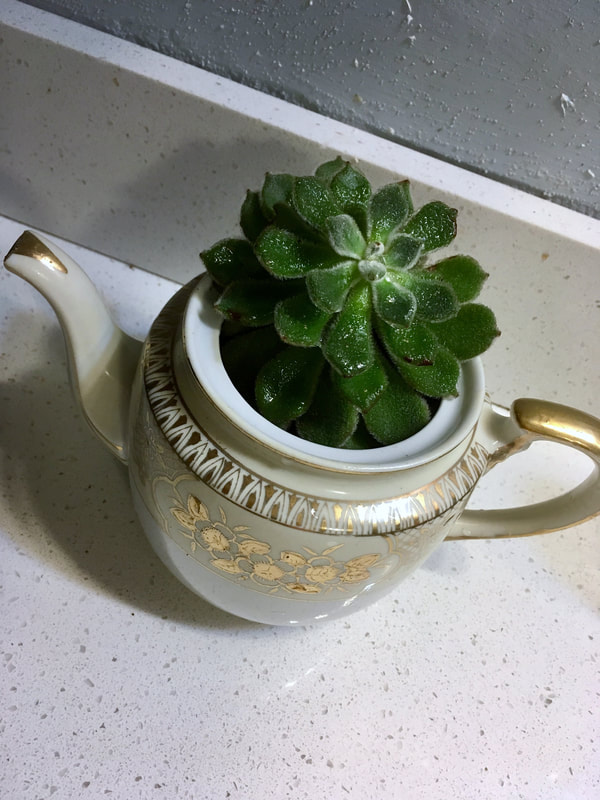
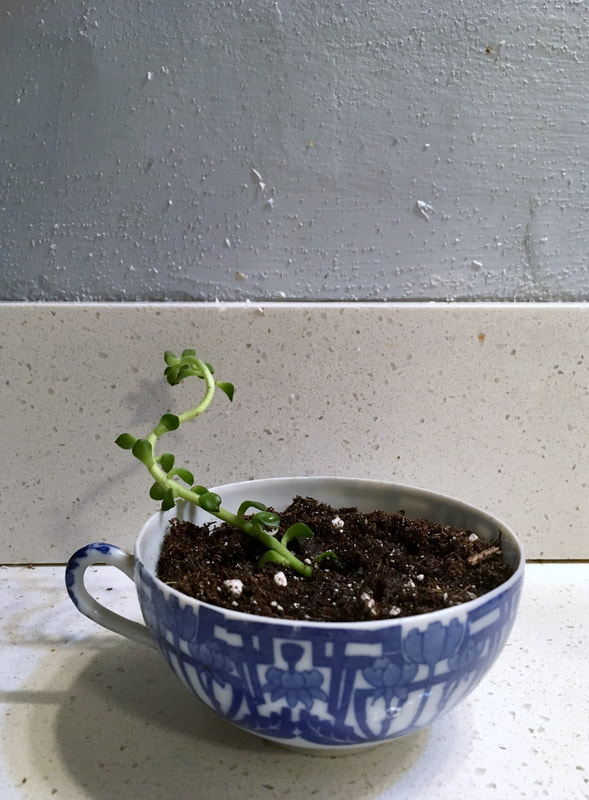
Here’s the process for making gorgeous, one-of-a kind beads: 1. Rub a few drops of olive oil on the surface of a bamboo skewer. Olive oil keeps the beads you’ll make from sticking to the skewer. 2. Tear a very long, thin triangular strip of paper from a page you’ve chosen. This step is crucial for making strong beads. (Short strips of paper result in a bead that crushes like a toilet paper roll!) 3. Wrap the strip around the skewer once or twice. At this point, begin to add individual drops of Modge Podge Matte Glue to the paper as you wind it around the skewer to form a bead. 4. Fill a skewer with multiple beads and let them dry overnight. 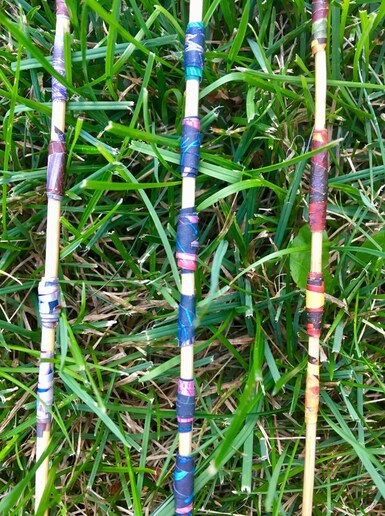 5. Brush a thin layer of Modge Podge Matte Glue over the surface of all the beads. Let them dry for several hours. 6. Spray the beads with Modge Podge Matte Clear Acrylic Sealer and let them dry for an hour. 7. Remove the beads from the skewer. You’re ready to make eco-chic jewelry! What do you get when you break a succulent? You’ll have even more succulents! Sometimes a part can become a whole! My mom propagated these sweet little succulents for me from plant cuttings. The larger plant grew roots in the air and the long, thin succulent grew roots in water. Check out this blog for more tips on succulent propagation. Recycled plants deserve extra special containers! These teacups from the 1930s make perfect homes for my new plants. It’s fun to find new ways to reuse and showcase vintage items! I hope you find some antique china and get growing, too! Do you have a small-scale garden or use vintage things in innovative ways? Please share your story in the thread below.
|
Hello, there!
Thanks for visiting! Archives
February 2024
Categories |


 RSS Feed