|
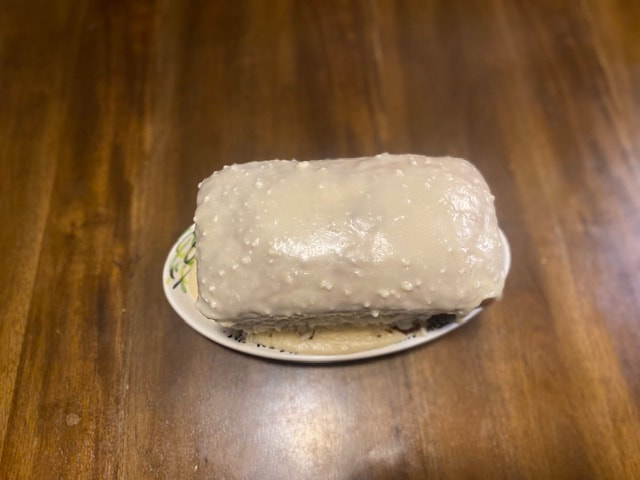
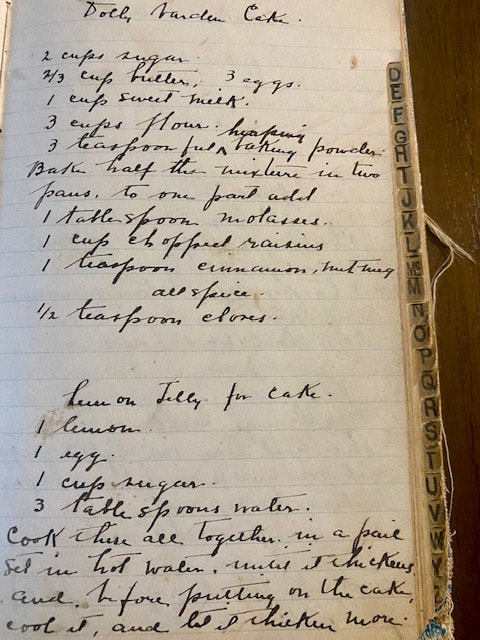
From the White House to your kitchen, this retro recipe has plenty of history and fall flavor! Dolley Madison was the wife of James Madison, the fourth president of the United States. During her time as First Lady, she took on a highly public role supporting her favorite causes and was known for both her unique personal style and being a gracious hostess of countless social functions. This cake is one of her many famous recipes. Surprisingly, Dolley Madison cakes were still being made in kitchens everywhere in the early 20th century. Maybe the World Wars piqued widespread interest in Americana and recipes from the past. The original recipe doesn’t note what type of frosting to use. I found out that Dolley Madison cake calls for caramel icing. You can either purchase some or try out the homemade caramel icing recipe that I used for my cake. Let’s get baking! 1. First, mix together the following:
2. Divide the mixture into two pans greased with butter. 3. To one pan, add:
4. Cook the cake layers for about 50 minutes at 350 °F. Remove the cake from the pan after it has cooled. 5. Add caramel icing between the spice cake and yellow cake layers. Drizzle icing all over the top of the cake. It’s time to enjoy your sweet treat! 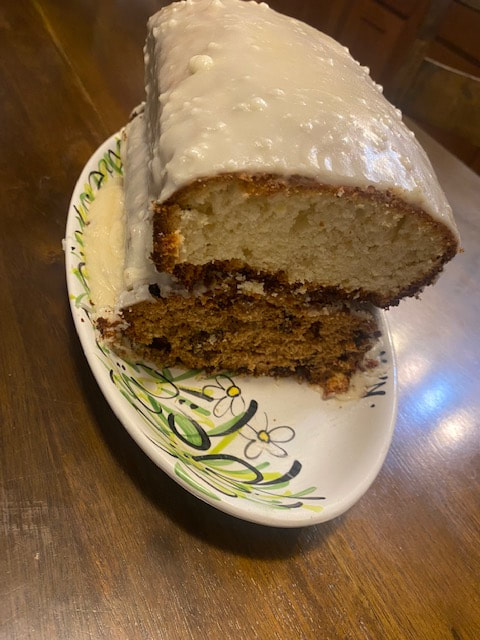
2 Comments
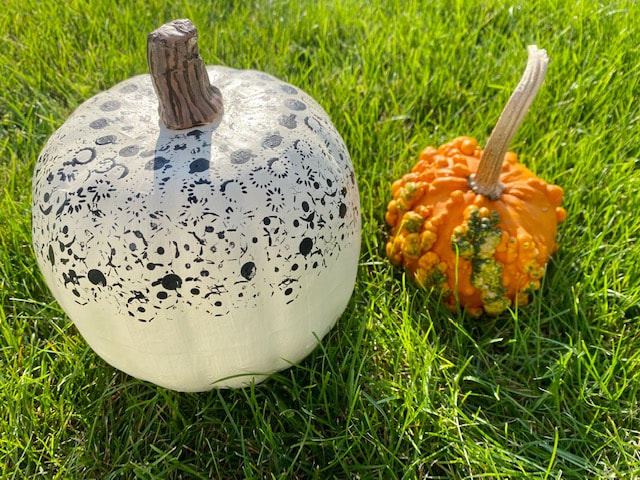
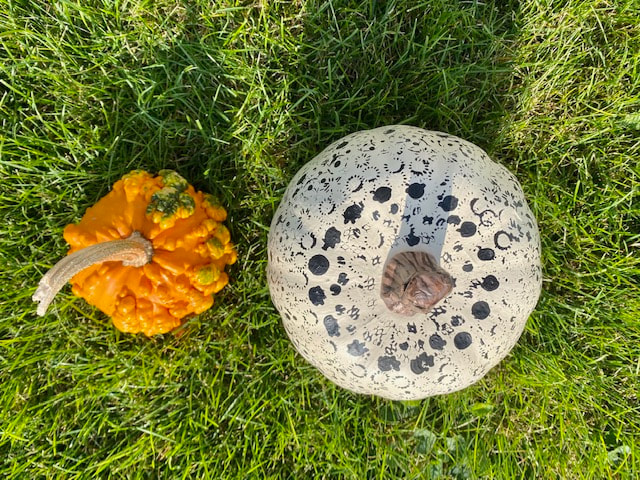
If you have no time to make it to the pumpkin patch this fall, that’s all right. In just an afternoon, create a paper mâché pumpkin that you’ll fall in love with year after year! This project explores the negative space and texture created by stamping a surface with found objects. I used a variety of vintage buttons to stamp my pumpkin, but you can use just about anything textured for stamping, including old, new, manufactured, or natural items. Pick your favorite crafting pumpkin and let’s begin! 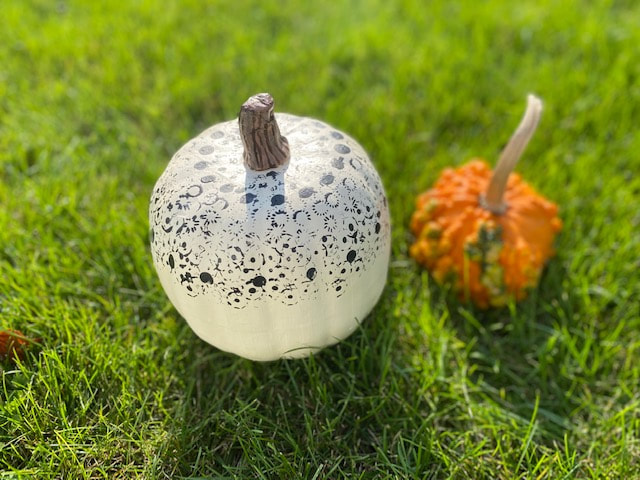 For this project, you’ll need:
1. Using a foam brush, evenly paint the pumpkin with 3 coats of cream acrylic paint, allowing each coat to fully dry. 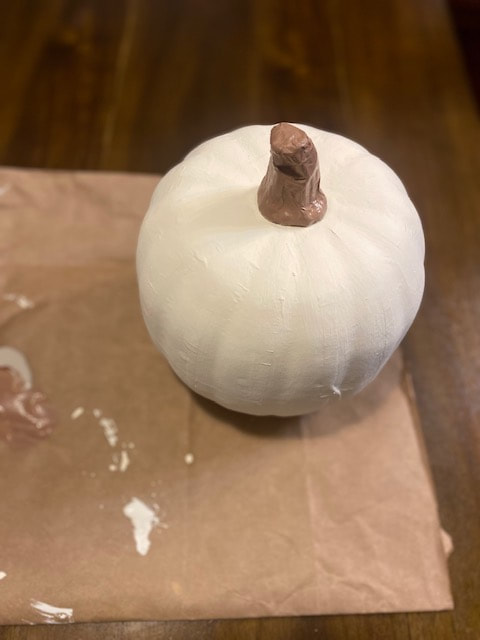 2. With the paintbrush, paint the pumpkin’s stem with brown paint and allow it to dry. Mix black and cream paint into the brown paint to create a lighter and a darker shade of brown. Paint fine lines onto the stem with the custom lighter and darker brown shades you mixed to add realistic variegation. 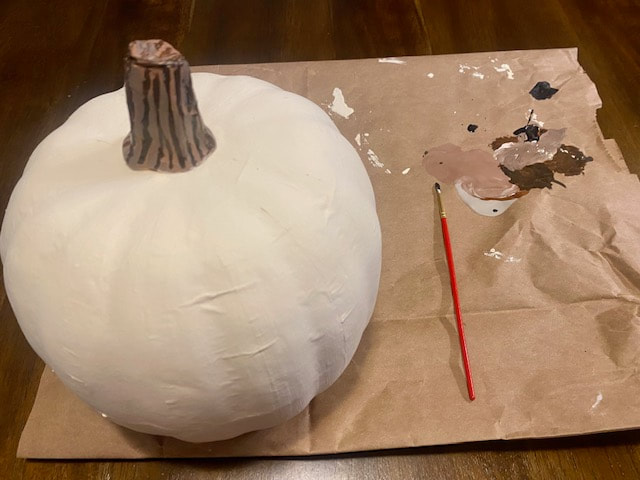 3. Use the foam brush to dab a thin layer of black paint onto the most raised parts of a found object. Stamp the design onto the pumpkin, starting with the part closest to the stem and working outward. Continue stamping with a variety of found objects to form a concentric design until you’ve decorated the top third of the pumpkin. Allow the paint to dry. 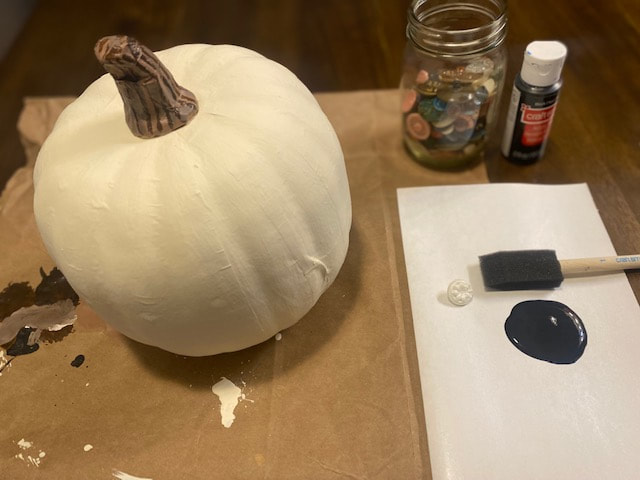 4. Spray the pumpkin with two coats of Mod Podge Matte Clear Acrylic Sealer to protect the paint job. Your pumpkin is now ready for its big reveal! I hope you enjoy this beautiful season. For more fall fun, please visit these previous posts:
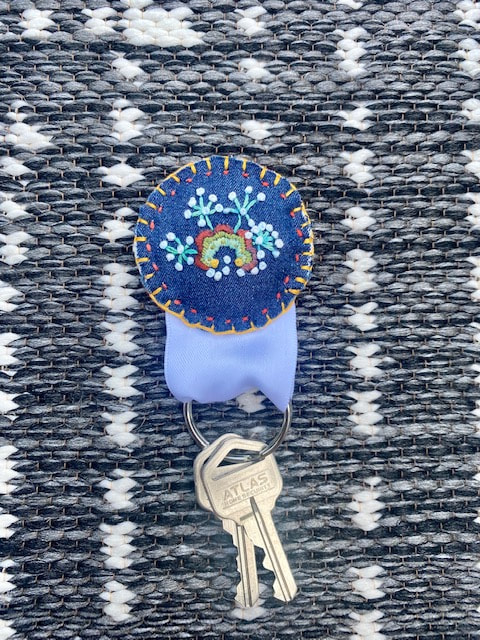
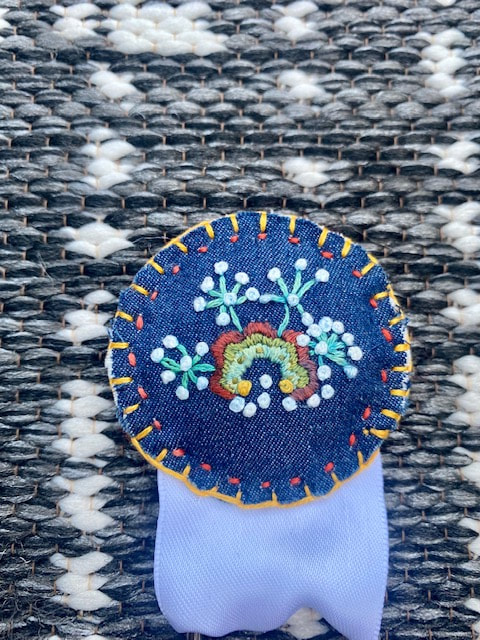
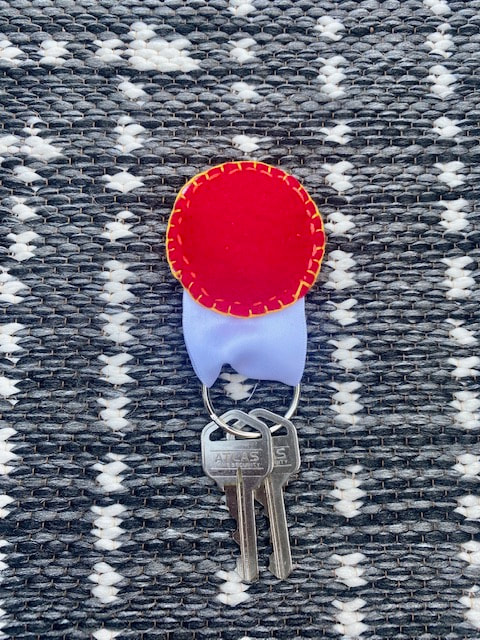
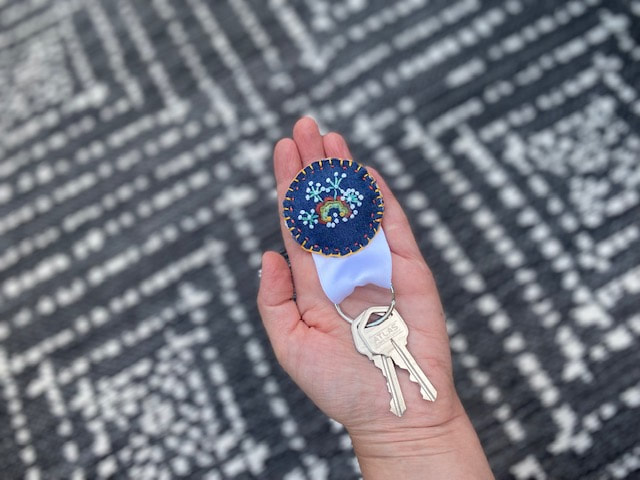
-To make a driftwood boho wall hanging - To create an upcycled driftwood pumpkin magnet - To mix up pumpkin pie ice cream - To fashion another fabulous faux pumpkin - To warm up with retro potato soup or cheddar harvest squash soup - To whip up coconut chai body balm - To stitch a reversible upcycled fall mandala locket - To curate a collection of cold weather essentials Don’t get locked out after your summer adventures! Keep your keys on hand with this whimsical yet practical embroidered accessory. To make this project, you’ll need:
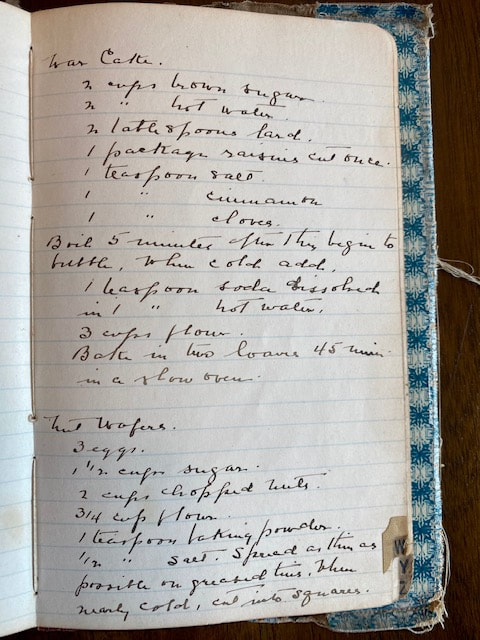
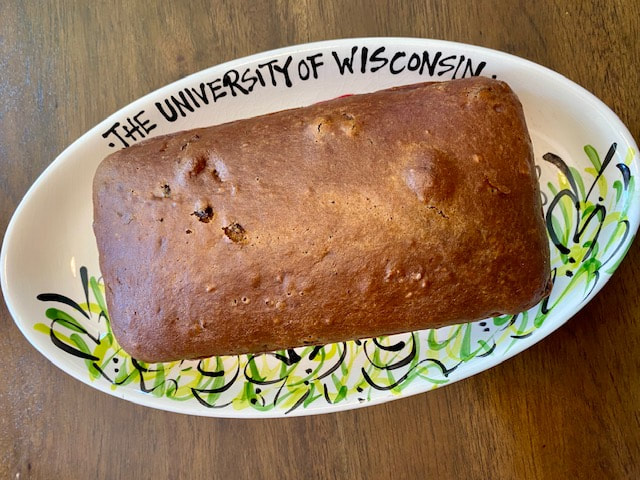
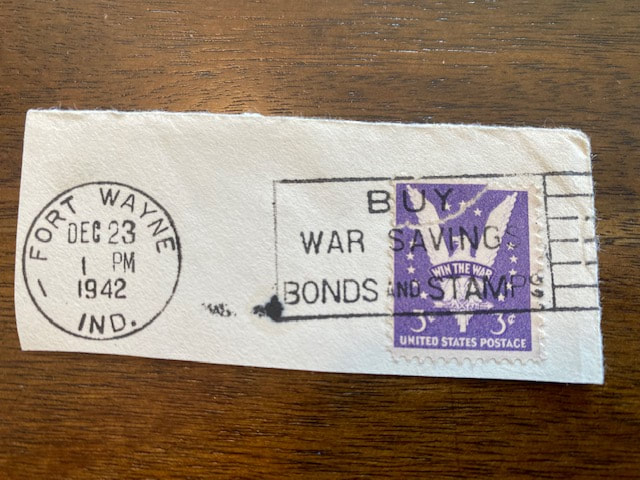
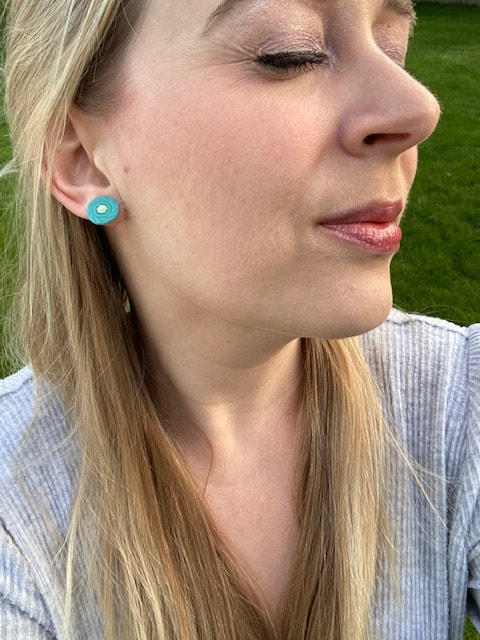
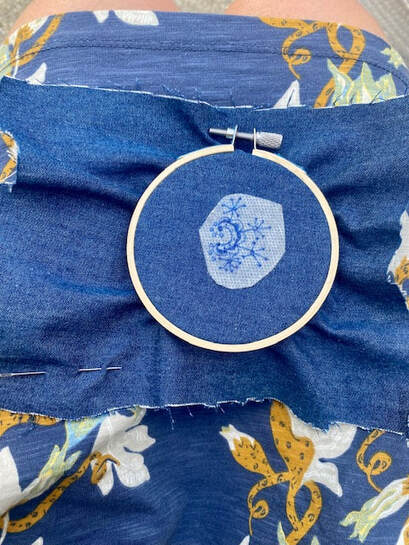 2. Using two stands of floss, fill in the scallops with satin stitch (using DMC #106, #742, and #744). 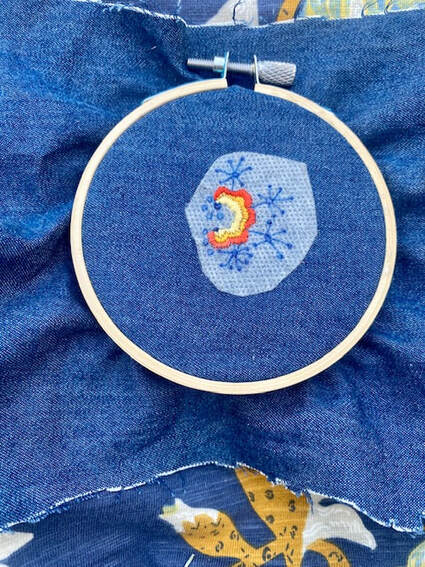 3. Do straight stitch with two strands (with DMC #125 and #832) to create the stems and add tiny details inside the scallops. 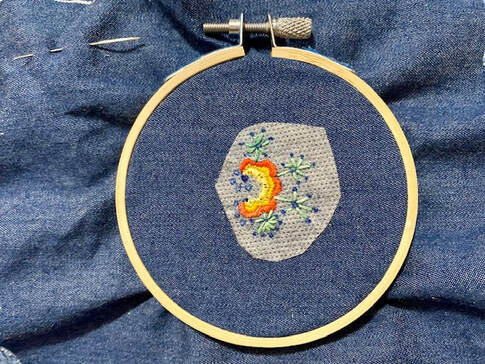 4. Stitch the French knots with two strands (with white and DMC #742). 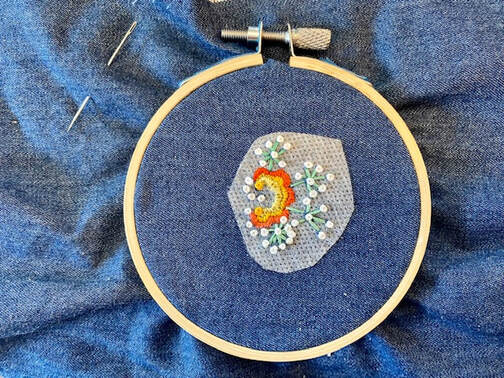 5. Dissolve the Magic Paper in cold water and let the denim dry completely. Iron the embroidered denim and piece of felt. 6. Trace two circles with 2” diameters onto the extra firm fusible interfacing. Cut out the interfacing circles. Iron the interfacing circles onto the reverse sides of the embroidered denim and felt following the instructions on the interfacing packaging. Trim the excess fabric around the interfacing circles. 7. Cut a 4” length of ribbon and thread it through the split ring. Pin the ribbon to the inside of the felt circle. 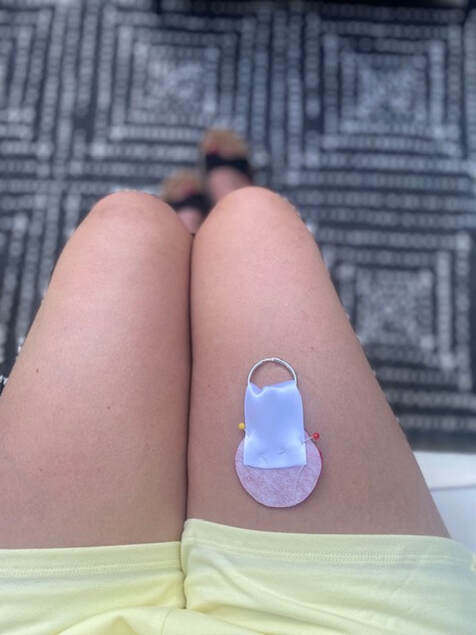 8. Pin the denim and felt circles together to conceal the fusible interfacing. 9. Sew the layers of fabric and ribbon together with running stitch (DMC #106). Before you close the seam, add a little fiber fill inside the keychain. 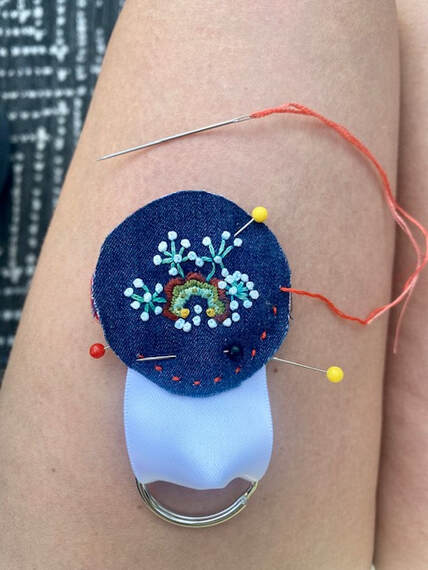 10. Use regular blanket stitch (DMC #742) to secure the raw edges and applique blanket stitch to attach the raw edges to the ribbon. It’s time to add your keys, please! Have a wonderful rest of your summer! You’ve experienced a toilet paper shortage in your lifetime! Imagine butter, white sugar, milk, and eggs being scarce or even unavailable. Mrs. Williams’ war cake recipe lets a baker do the impossible: cooking up something sweet despite World War II rationing with the art of substitution. I’ve modified her recipe slightly to add missing information. To make this recipe, you’ll need: - 2 cups of brown sugar* - 2 cups of hot water* - 2 tablespoons of lard* - ½ cup of raisins cut once* - 1 teaspoon of salt* - 1 teaspoon of cinnamon* - 1 teaspoon of cloves* - 1 teaspoon of baking soda - 3 cups of flour 1. Boil all the ingredients on the list marked with an * for 5 minutes until the mixture begins to bubble. 2. When the mixture is cold, add 1 teaspoon of baking soda dissolved in 1 inch of hot water and 3 cups of flour to it. 3. Bake in two loaves in greased bread pans for 45 minutes in a slow oven (325°F). When you look good, you feel good! Put some extra spring in your step by accessorizing your favorite looks with vintage button earrings that take just minutes to create. To make this project, you’ll need:
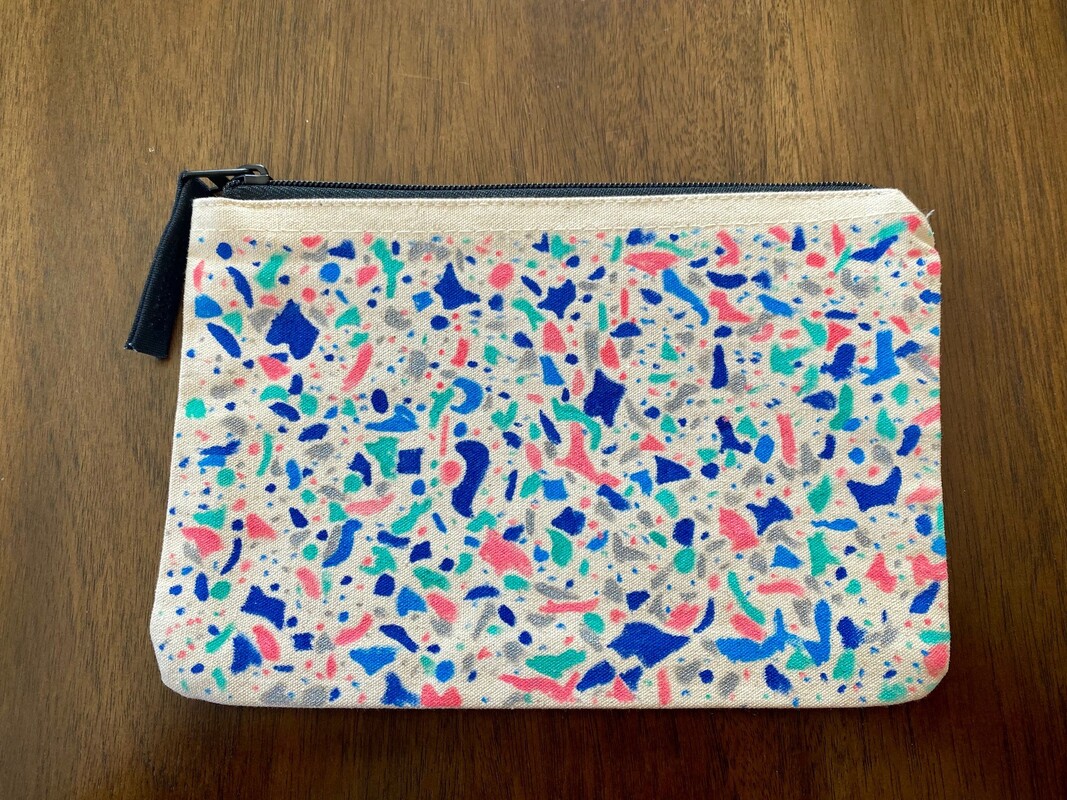
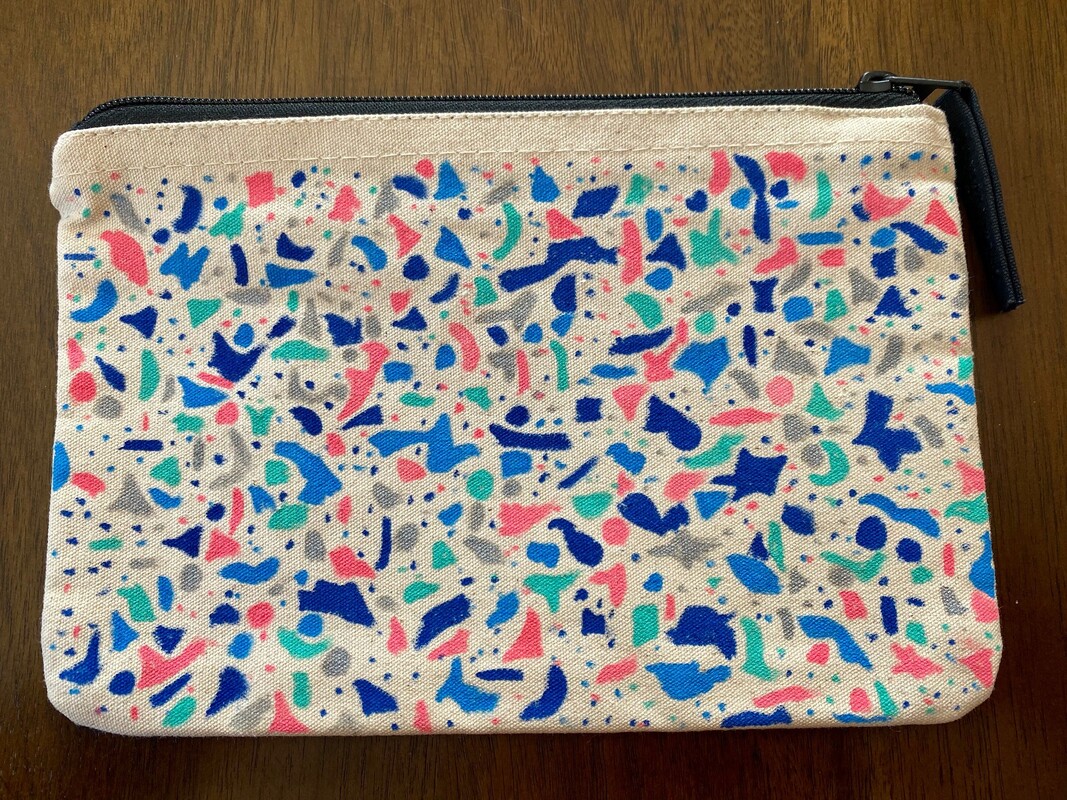
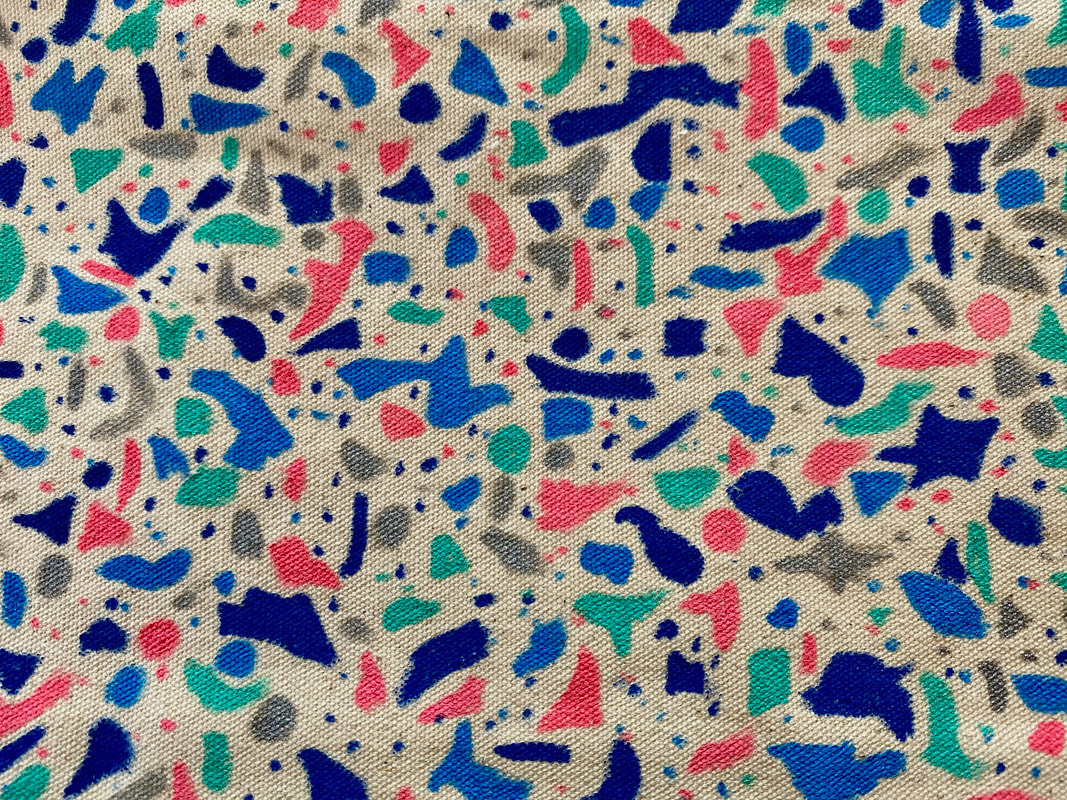
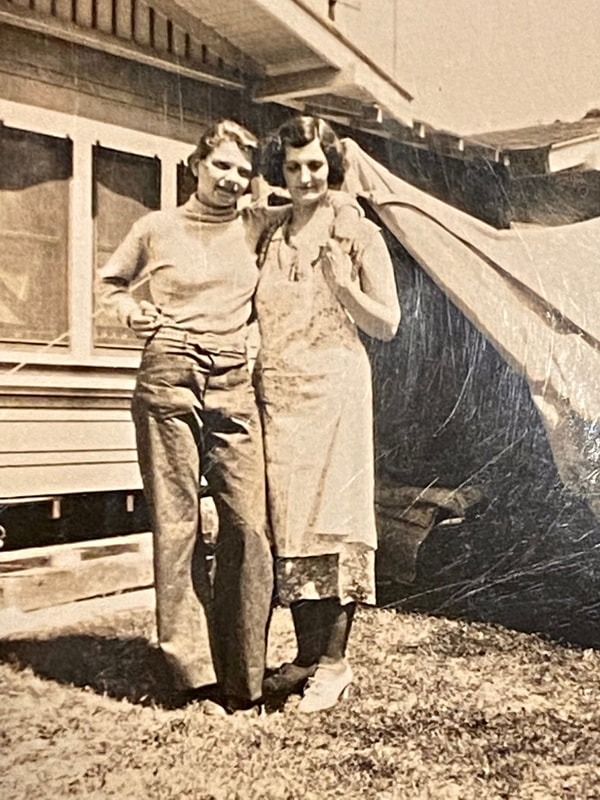
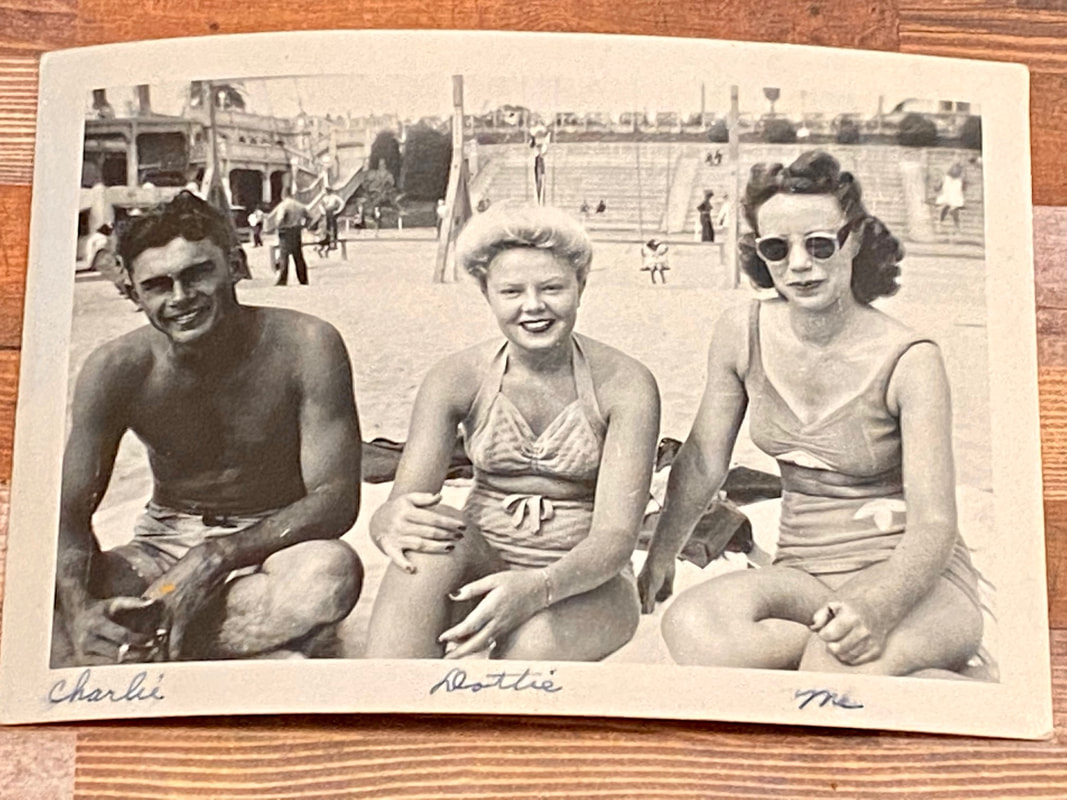
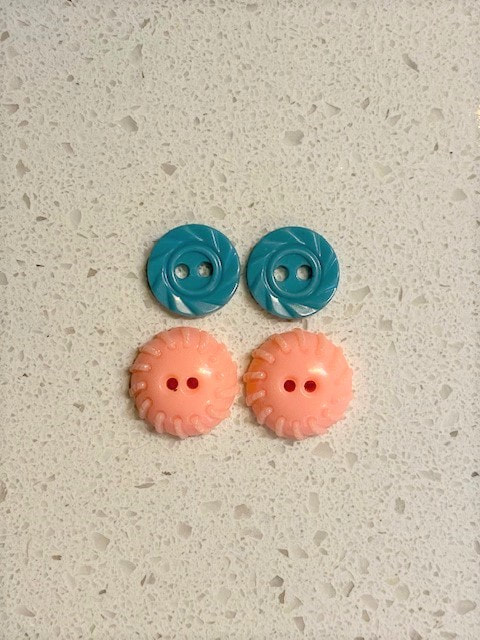 2. Fill the buttonholes with 3 strands of embroidery floss in a contrasting color. Tie the threads behind the button to secure them and trim the ends. 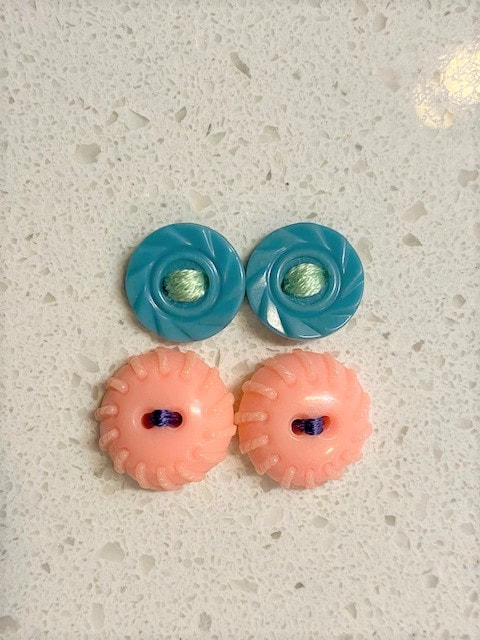 3. Use a hot glue gun to attach the pad posts to the buttons. Add a drop or two of hot glue to the back of a button and press a pad post into the glue. Allow the hot glue 10 to 20 minutes to cool and set. Let the glue cure for a full 24 hours before wearing your earrings. 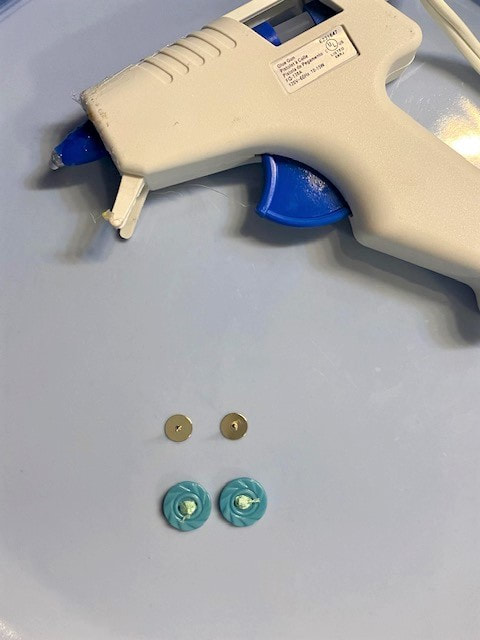 Say hello to spring with your new jewelry! Are you ready to kiss winter goodbye? Prettify your spring-cleaning ritual with some cute storage options. Create a personalized pouch with a bright, refreshing print to keep your life organized. To make this project, you’ll need: 1. Put a piece of paper inside the pouch to prevent paint from bleeding through both layers of the fabric as you draw on it. 2. Use a fabric marker to decorate one side of the pouch with pebble-like shapes, dots, and sprinkles all in the same color. Allow the paint to fully dry.  3. Fill the remaining space with similar designs in contrasting colors. Paint the reverse side of the pouch in the same way. 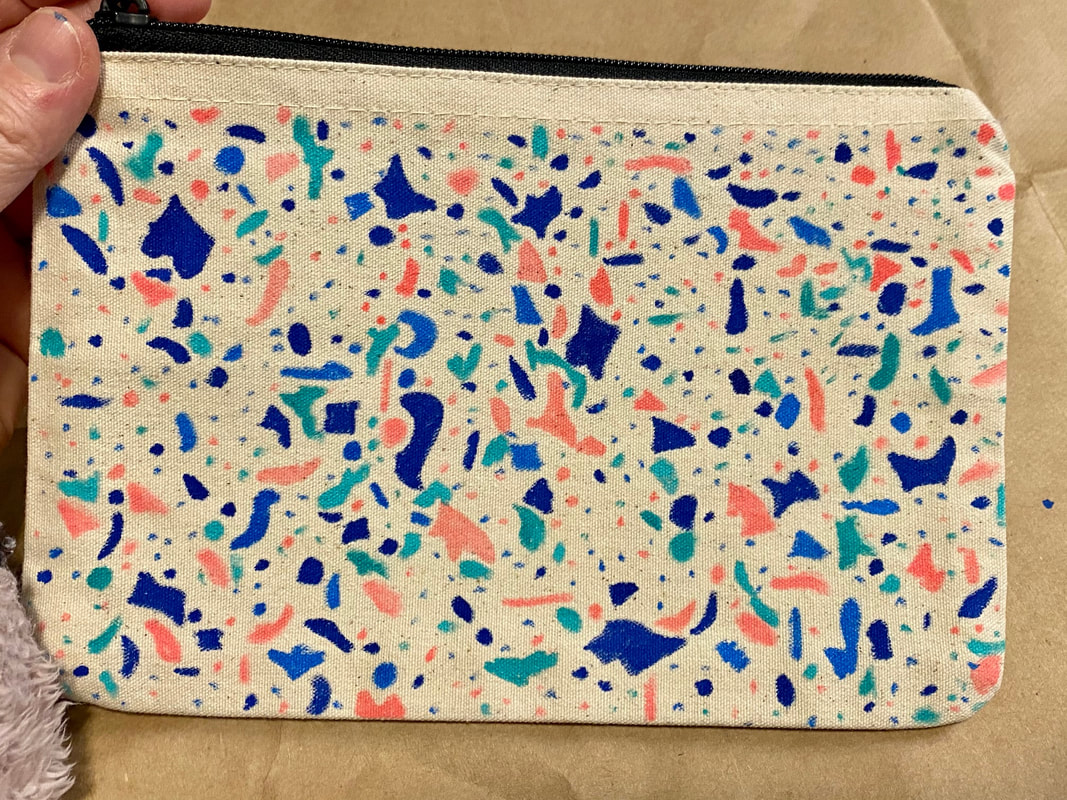 Try making this project with other painterly or abstract designs. Your creativity has no limits! In honor of Galentine’s Day, here are some snaps of gal pals having fun together from my vintage photo collection. These besties posed for this picture in the 1930s. Wide-legged pants were first worn by avant-garde ladies during the Roaring Twenties, mostly by celebrities. The lounge pants of the 1920s were pajama style and made of silky, opulent fabrics. By the 1930s, women everywhere sported more casual wide-legged pants. The marine style worn by the woman on the left came in vogue then. These friends enjoy a beach day in the 1940s. Women’s swimsuits of this decade were form-fitting and revealed the midriff, but still had straps.
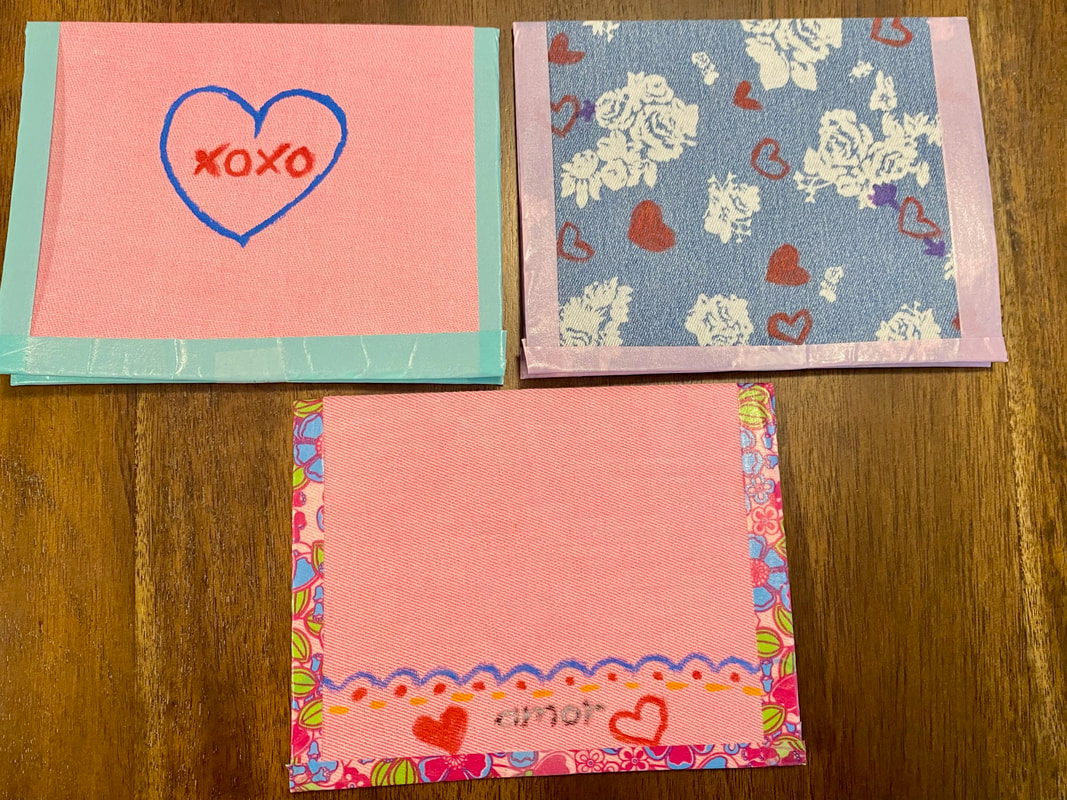
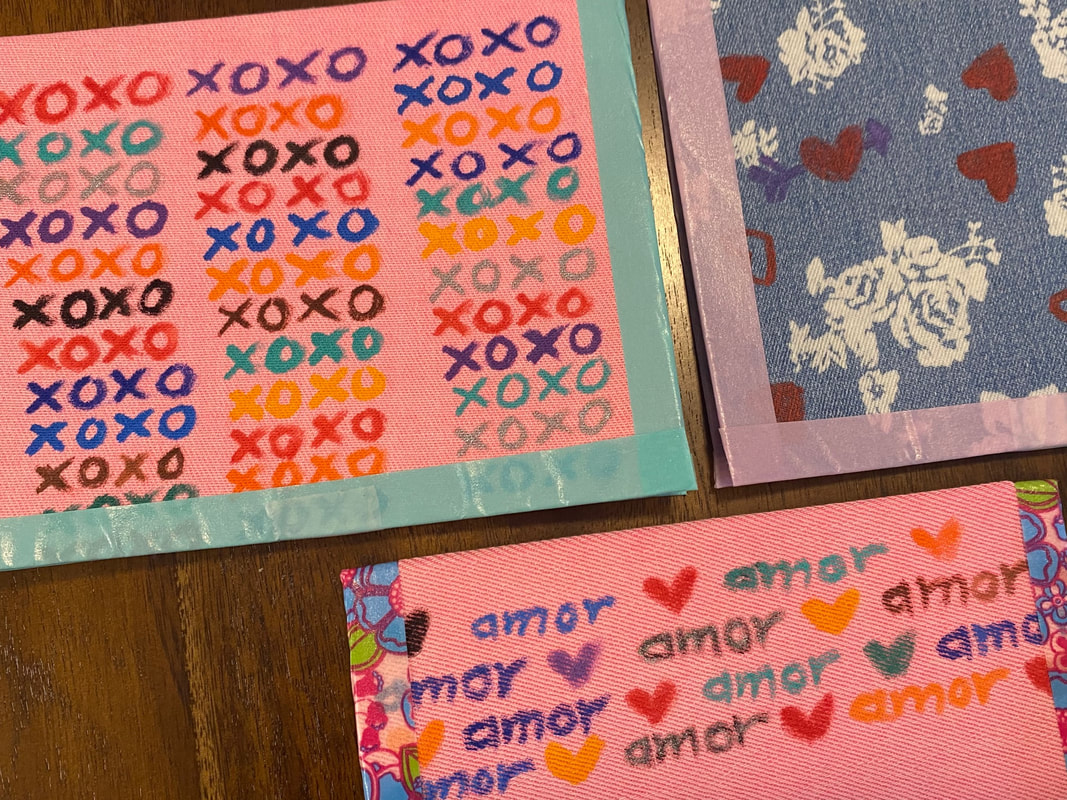
Here’s to good times and forever friends! Say goodbye to your old jeans and hello to your favorite people with this speedy, fun project. These handmade Valentines are heartfelt and eco-friendly—now, that’s love! To make this project, you’ll need:
1. Trace the outline of a card onto a piece of denim. Cut out the rectangle of fabric that will cover the front of the card. 2. Iron the fabric to remove any wrinkles. 3. Use Tulip fabric markers to decorate the denim with designs. Let the paint fully dry. 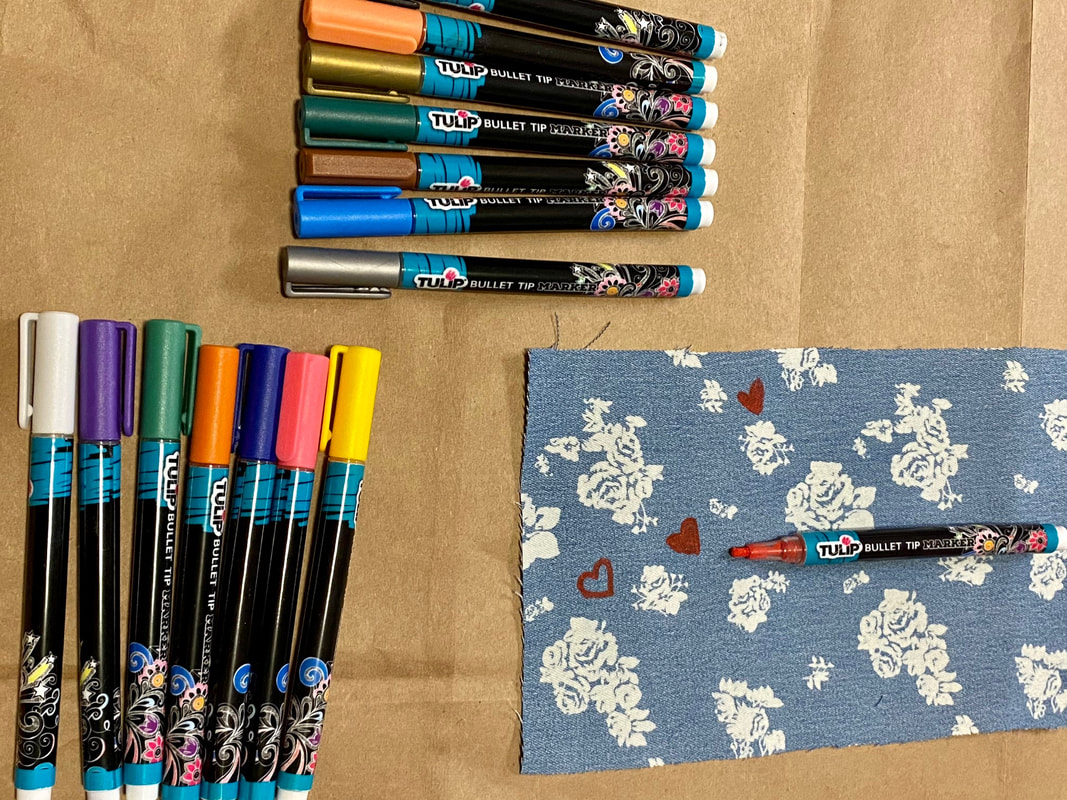 4. Use a foam brush to spread a thin layer of Modge Podge Matte glue on the card’s surface. Apply the denim to the card and press it down firmly, smoothing the fabric as needed. Let the glue dry for about 20 minutes. 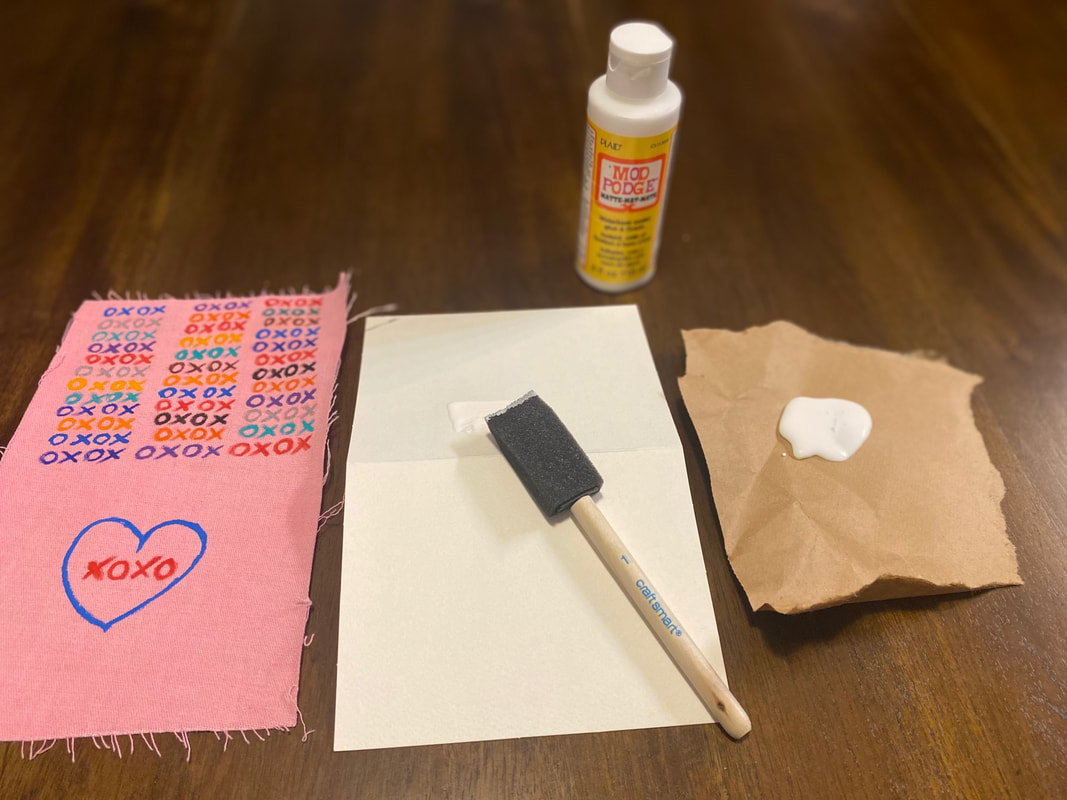 5. Trim any excess denim from around the card. Cover the edges of the card with Washi tape. Try doing this project with other types of fabric and a variety of paint designs to make cards that are perfect for any holiday or special occasion!
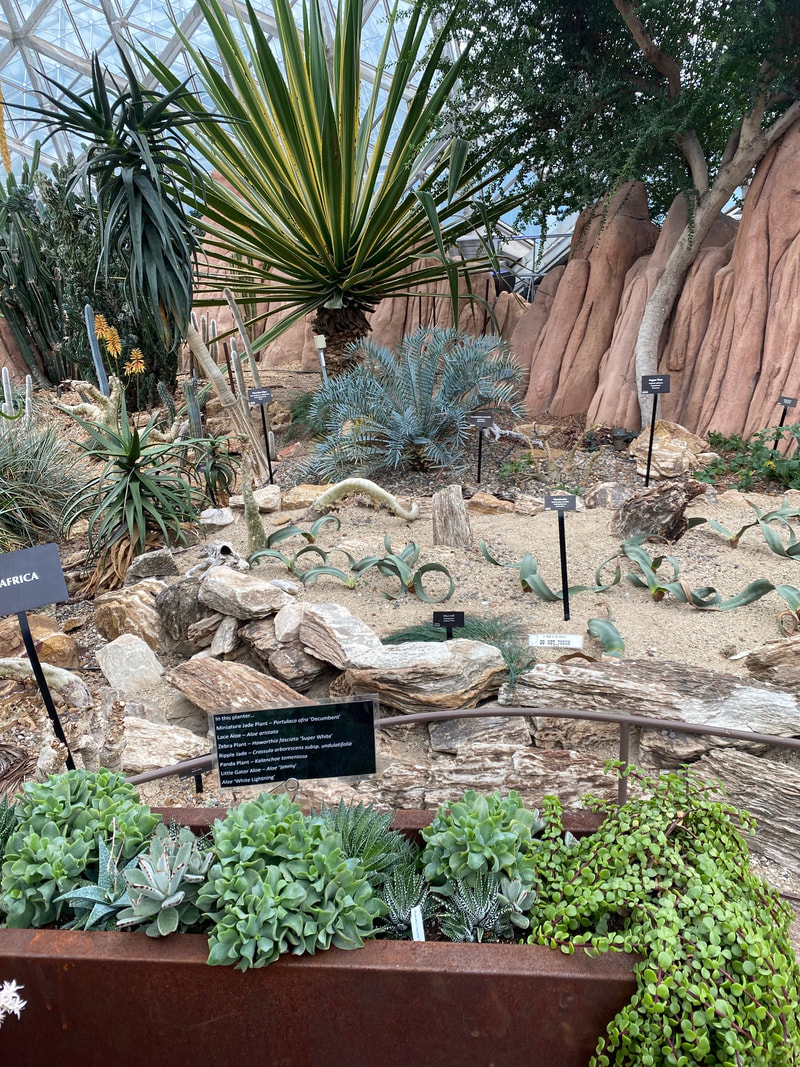
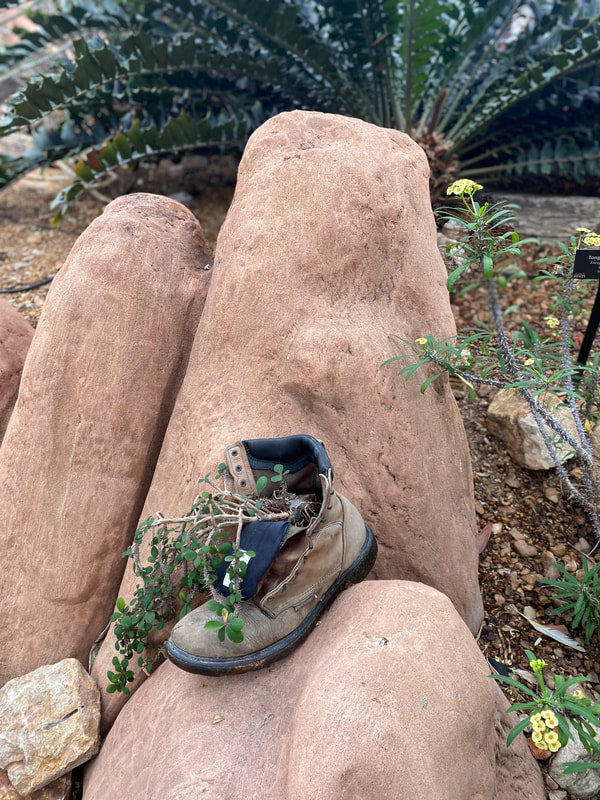
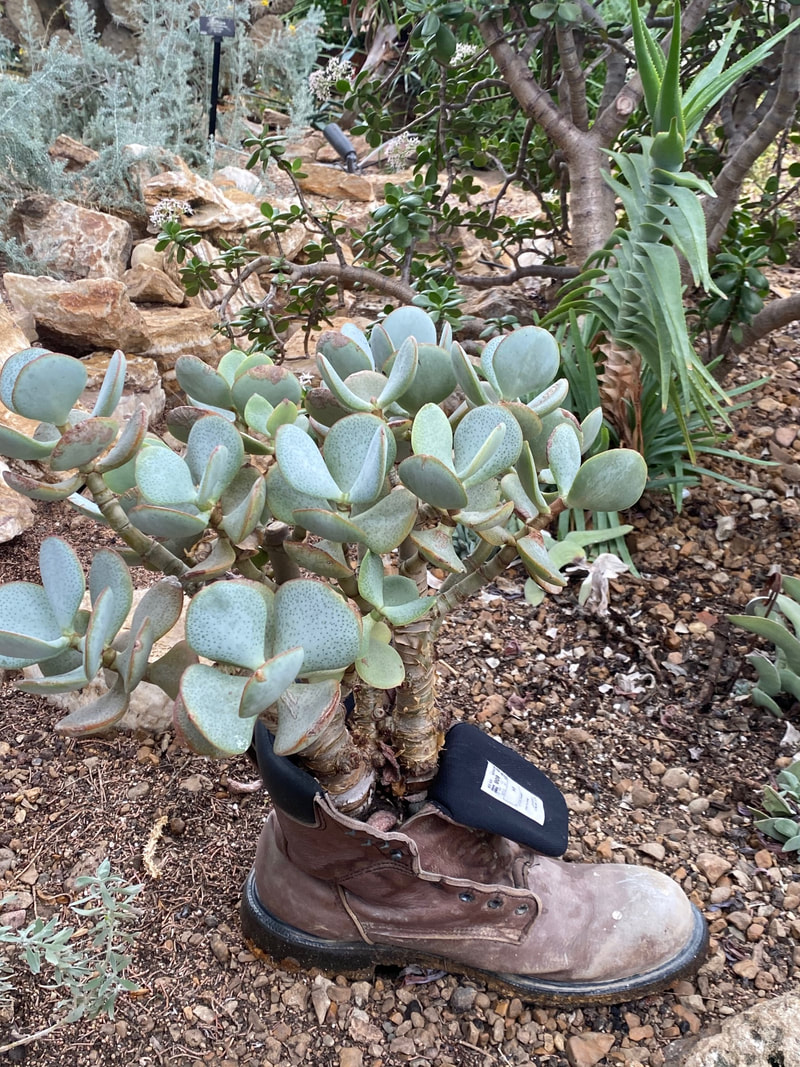
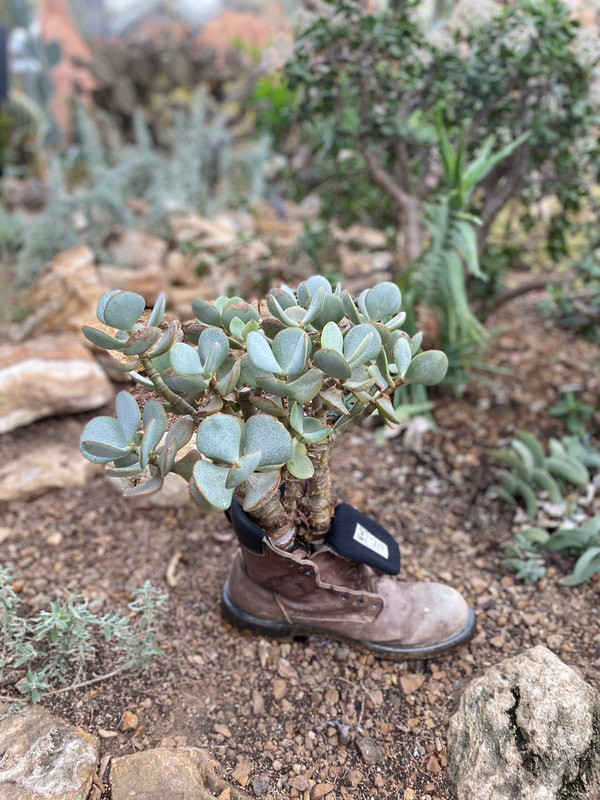
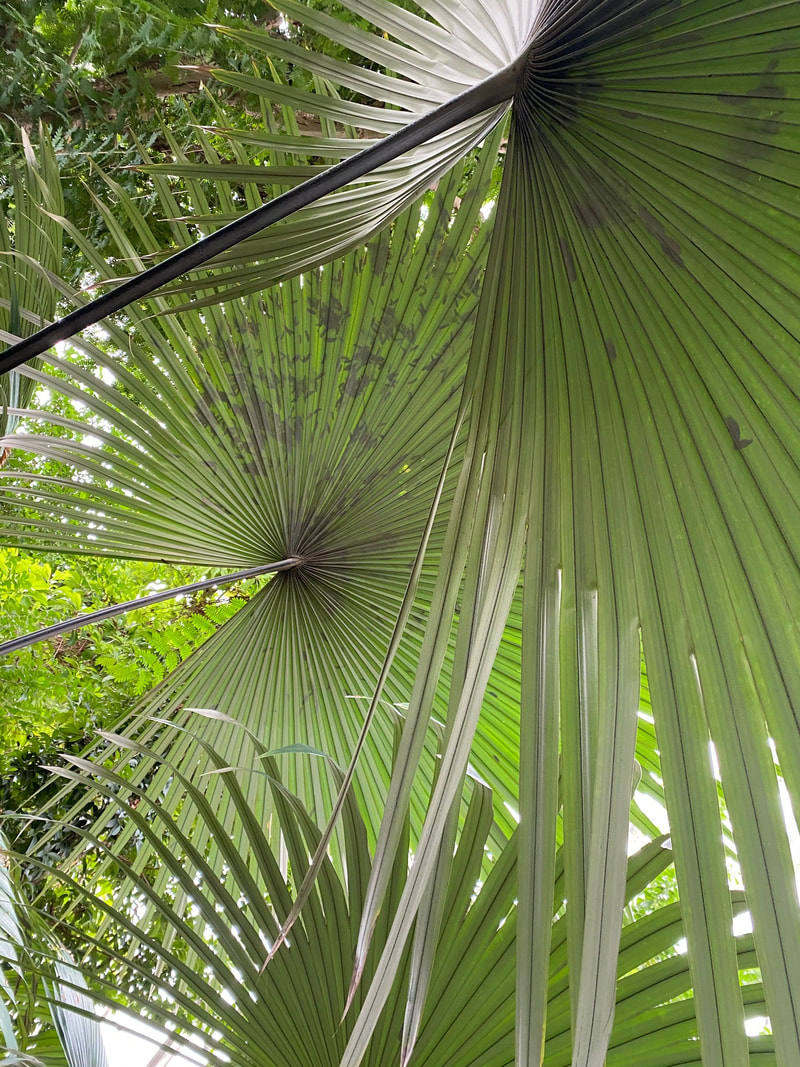
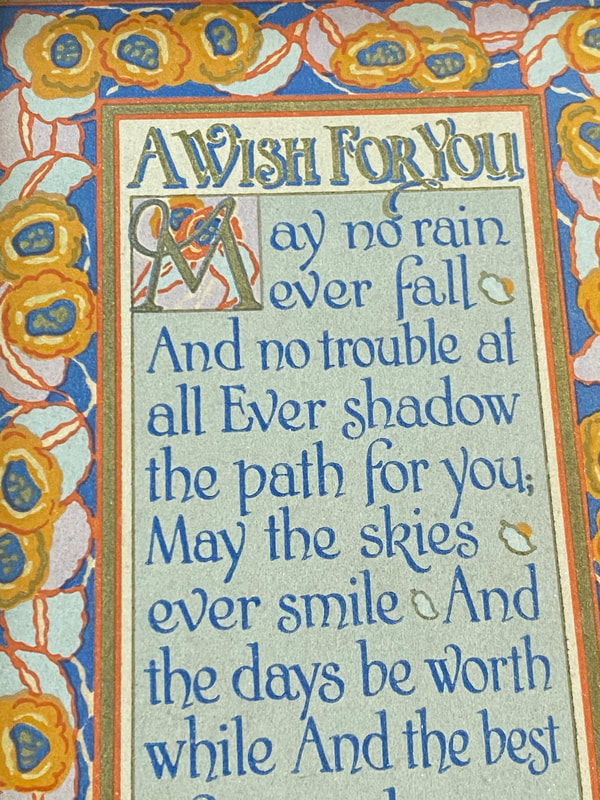
No matter what industry or sector you’re in or what your interests are, making small decisions to live and work sustainably is for you. On a visit to the Domes, you’ll learn a lot about botany and see some upcycling, too. In the Desert Dome, worn out work boots take on new life as planters. Even if you’re not on a shoestring budget, your succulents will feel right at home in your old kicks. Resolve to go green and if you have the chance, enjoy some leafy beauty at the Domes, too! 2020 has been an unforgettable year dominated by a global pandemic and instability, but the important thing is we’ve made it through these difficult times, one day at a time. Despite everything, there are always good and beautiful things to be thankful for in life. Sending positive vibes to your loved ones is nothing new. From my vintage paper collection, here’s my wish for 2021 for you: Happy New Year! Here’s to a full recovery and better times ahead!
|
Hello, there!
Thanks for visiting! Archives
February 2024
Categories |


 RSS Feed